Here’s an old video I didn’t link on my site that I wanted to make available. This is a short tutorial on replacing the battery on a Gameplan MPU-2 board from a Sharpshooter II pinball machine.
Category Archives: Circuit Board
Upgrading eddy/proximity sensors on Bally/WMS games (Theater of Magic)
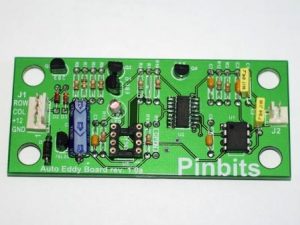 Recently I decided to replace the trunk eddy sensor on Theater of Magic with something more reliable than the original Bally/Williams proximity sensors. They are prone to “drifting” and will need regular adjustment. There’s a company that makes an auto-adjusting board that I wanted to try out, so here is my video showing the installation of that new board. This should make the game a little bit more reliable.
Dignosing and fixing a dead WPC MPU board (with RAM upgrade)
In this video series, I am working on a client’s “Dr. Who” pinball machine that wouldn’t boot up. It was just dead. None of the diagnostic LED blinks would blink on the WPC-89 MPU board, so I go over the process of how to identify and isolate the problem, then I upgrade the board with NVRAM (non-volatile memory) so that it will never need batteries again.
Making a pinball board test rig using a PC power supply
Here’s a quick video that shows how to take an old PC power supply you may have laying around and use it to power up pinball boards for testing. I use the Bally-35 MPU board as an example of how we can set this up to do board work on the MPU while it’s outside of the actual pinball machine. This is great for testing things while you’re refurbishing a board that’s been giving you problems.
First Look: Bally Kings of Steel Pinball – bringing a dead MPU back to life
This is a nice video series I’ve been working on for the last 2-3 weeks involving a very nice-condition, 1984 Bally “Kings of Steel” pinball machine – you just don’t see this game very often. I think I’ve actually never played one before so I was psyched to pick up the game. Unfortunately, like most of the time, it didn’t work — this game would not boot up and had some obvious issues. Here is a video playlist of my work thus far getting the MPU board back in action. This is a particularly good sequence going over how to trace issues on the MPU board, and in this case, it wasn’t a typical battery-leaking-damage situation. Something else was wrong as you’ll see..
Recommended mods to Bally-18/35 and Stern solenoid driver boards
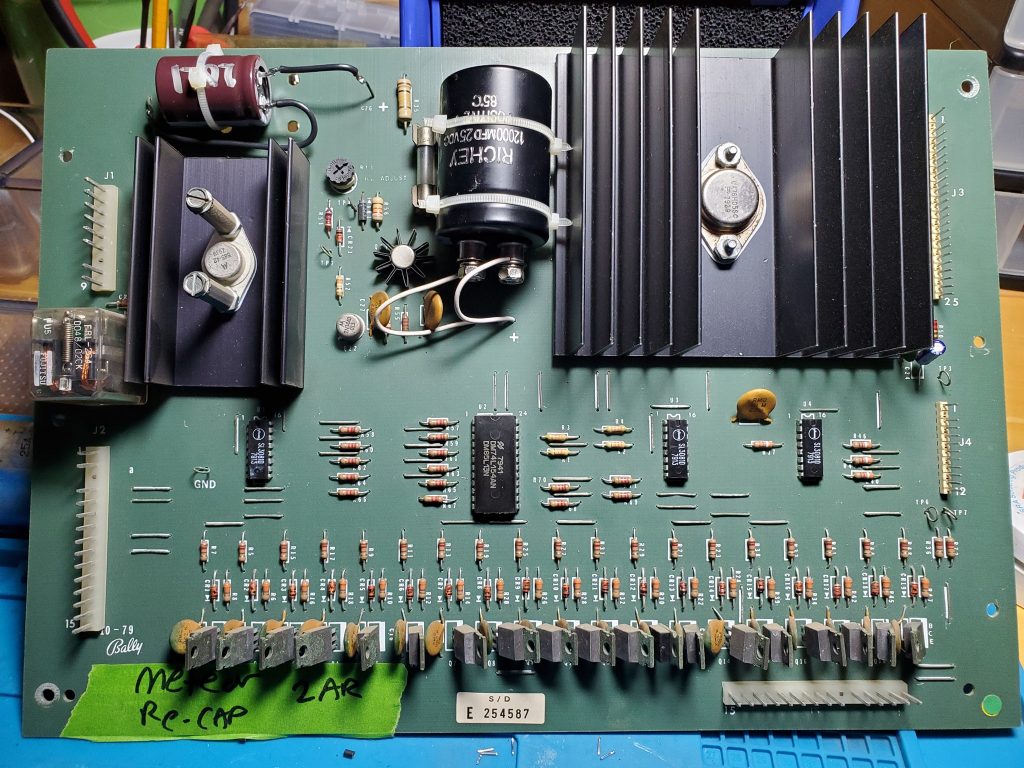
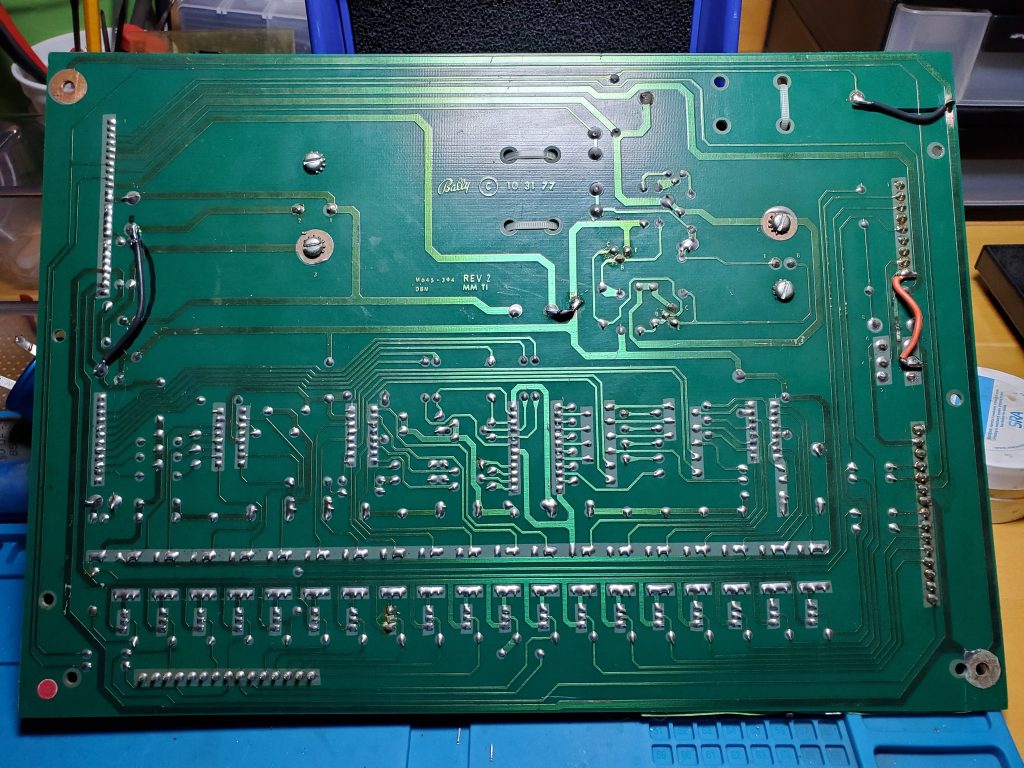
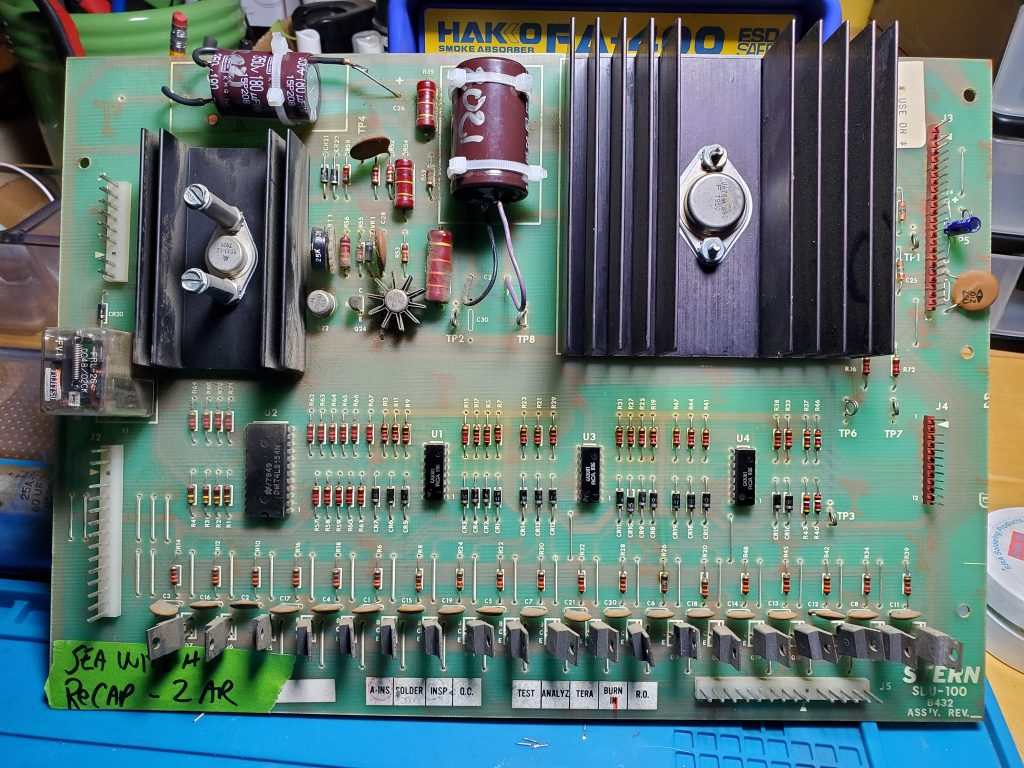
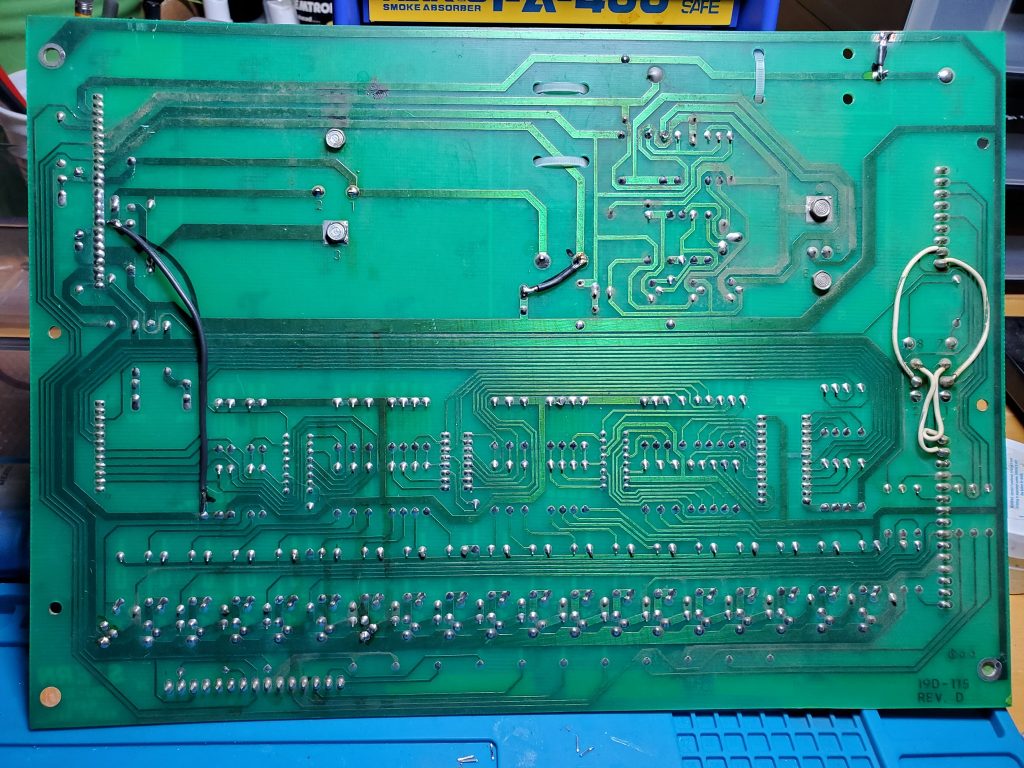
In today’s episode, I go over some standard, recommended modifications to the Bally-35 series solenoid driver board. There are over 60 popular pinball games that use this hardware setup and these quick modifications will help make the game run better and more-reliably. They involve adding three jumpers to the board. Whenever I have a chance to work on one of these boards, I do these mods.
Here are some front and back pictures of both Bally and Stern Solenoid driver boards. The black wires are the mods. The other colored wires are done by operators having to do with the coil lockout relay.
Fixing slingshots and coils that don’t fire on Williams System 3+
In this video series, I go over a 1979 Williams Flash pinball machine that has a few issues. After rebuilding the sound card and getting the sound working, I move on to figuring out why several of the playfield features are not working. I go through step-by-step trying to figure out where the problem is and why certain coils are not firing, eventually tracing it all back to logic chips on the driver board. Watch me as I fumble my way into getting the game back to 100%, and as usual, pardon my occasional tangents and erroneous conclusions as I diagnose where the problems are in this un-edited video series.
In Summary, there are a few steps to follow when you’re trying to diagnose a playfield coil that does not properly fire.
First, as always, make a visual check of the playfield and connectors to see if you notice any obvious problem like a broken wire or diode, coil winding that has come loose, or an obviously burned coil, or cracked/loose solder joint.
Second, check to see if there’s power to the coil and it can be manually trigger by grounding the non-power-supplied lug.
Third, go into coil test mode and see if the coil can be fired from the diagnostics. (if it can but not in game play, it is likely a switch problem)
Forth, trace continuity in the switch matrix wiring to/from the playfield. Also note (as I later discovered while working on this game) that if the coil is using one of the special solenoids, it will have a second trigger switch/line that needs to be checked.
Fifth, if continuity checks out, then test the switch matrix or trigger lines on the driver board.
If you’re at this point and things still don’t work, it’s time to examine the driver transistors and pre-drivers… you should have, at step 1, examined the driver board to see if there were any obviously burned components on the driver board. Now you have to bust out a multi-meter and check the transistors and ICs in the signal path — noting that if they test good, this dosn’t mean they necessarily are good.
If there still is no conclusive cause, you have to start replacing components, starting with driver and pre-driver transistors, and then the 7408 and 7402s.
