I found this old video the other day and realized I didn’t have a post on my main site showcasing this video so I wanted to add it (also, this was before I learned the proper pronunciation of “Bally” LOL…. bah-lee).
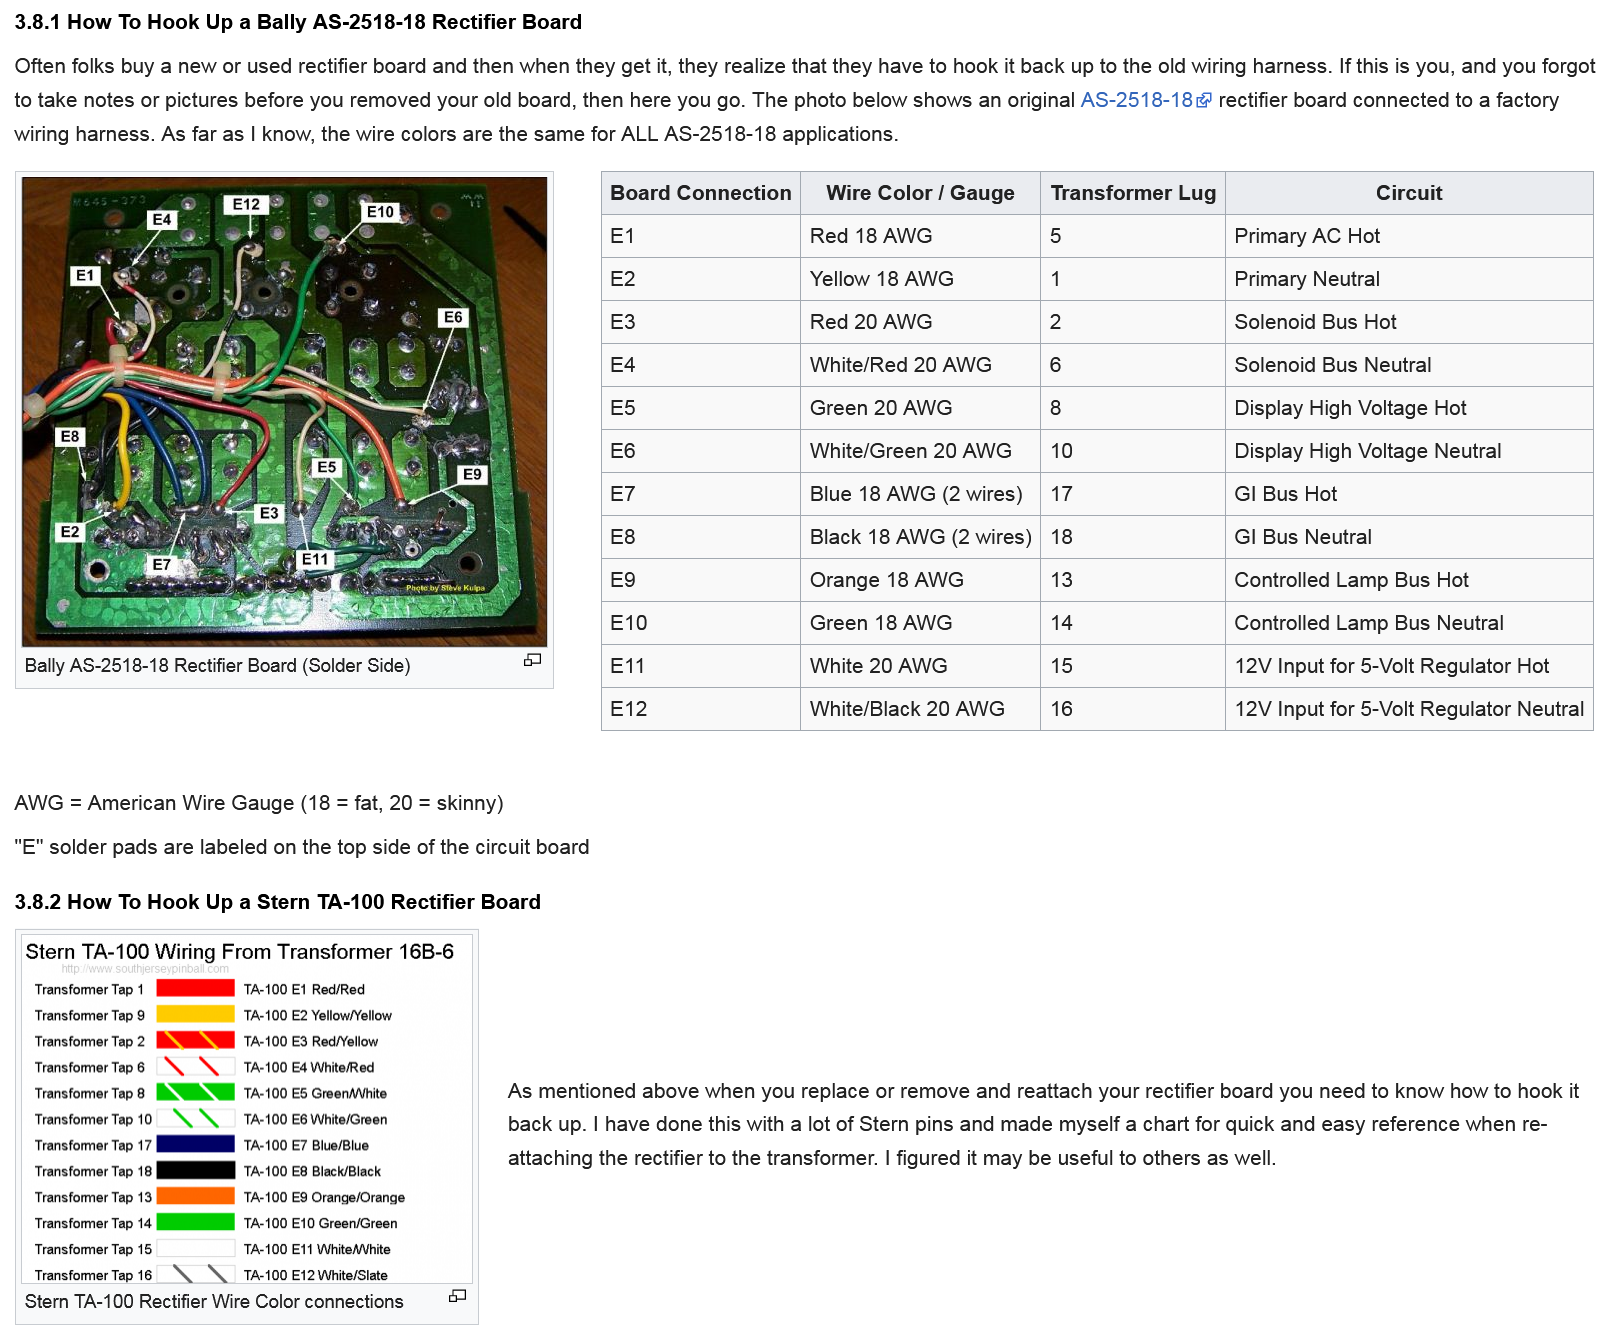
As part of the ongoing restoration of a 1979 Stern “Trident” pinball machine, here’s a series of videos outlining how to replace the rectifier board on these games. This varies a bit between Stern and Bally due to wire color codes. References are here.
Here’s a quick video that shows how to take an old PC power supply you may have laying around and use it to power up pinball boards for testing. I use the Bally-35 MPU board as an example of how we can set this up to do board work on the MPU while it’s outside of the actual pinball machine. This is great for testing things while you’re refurbishing a board that’s been giving you problems.
In the continued saga of bringing this 1980s game back to life, I begin to go over the electronics and figure out why the game wouldn’t boot up. Normally you fire up these Bally machines and count the number of times the LED on the MPU board blinks, but in this case, the game didn’t even get far enough to begin to start up the MPU. Fuse F3 kept blowing and the game wouldn’t power up at all…
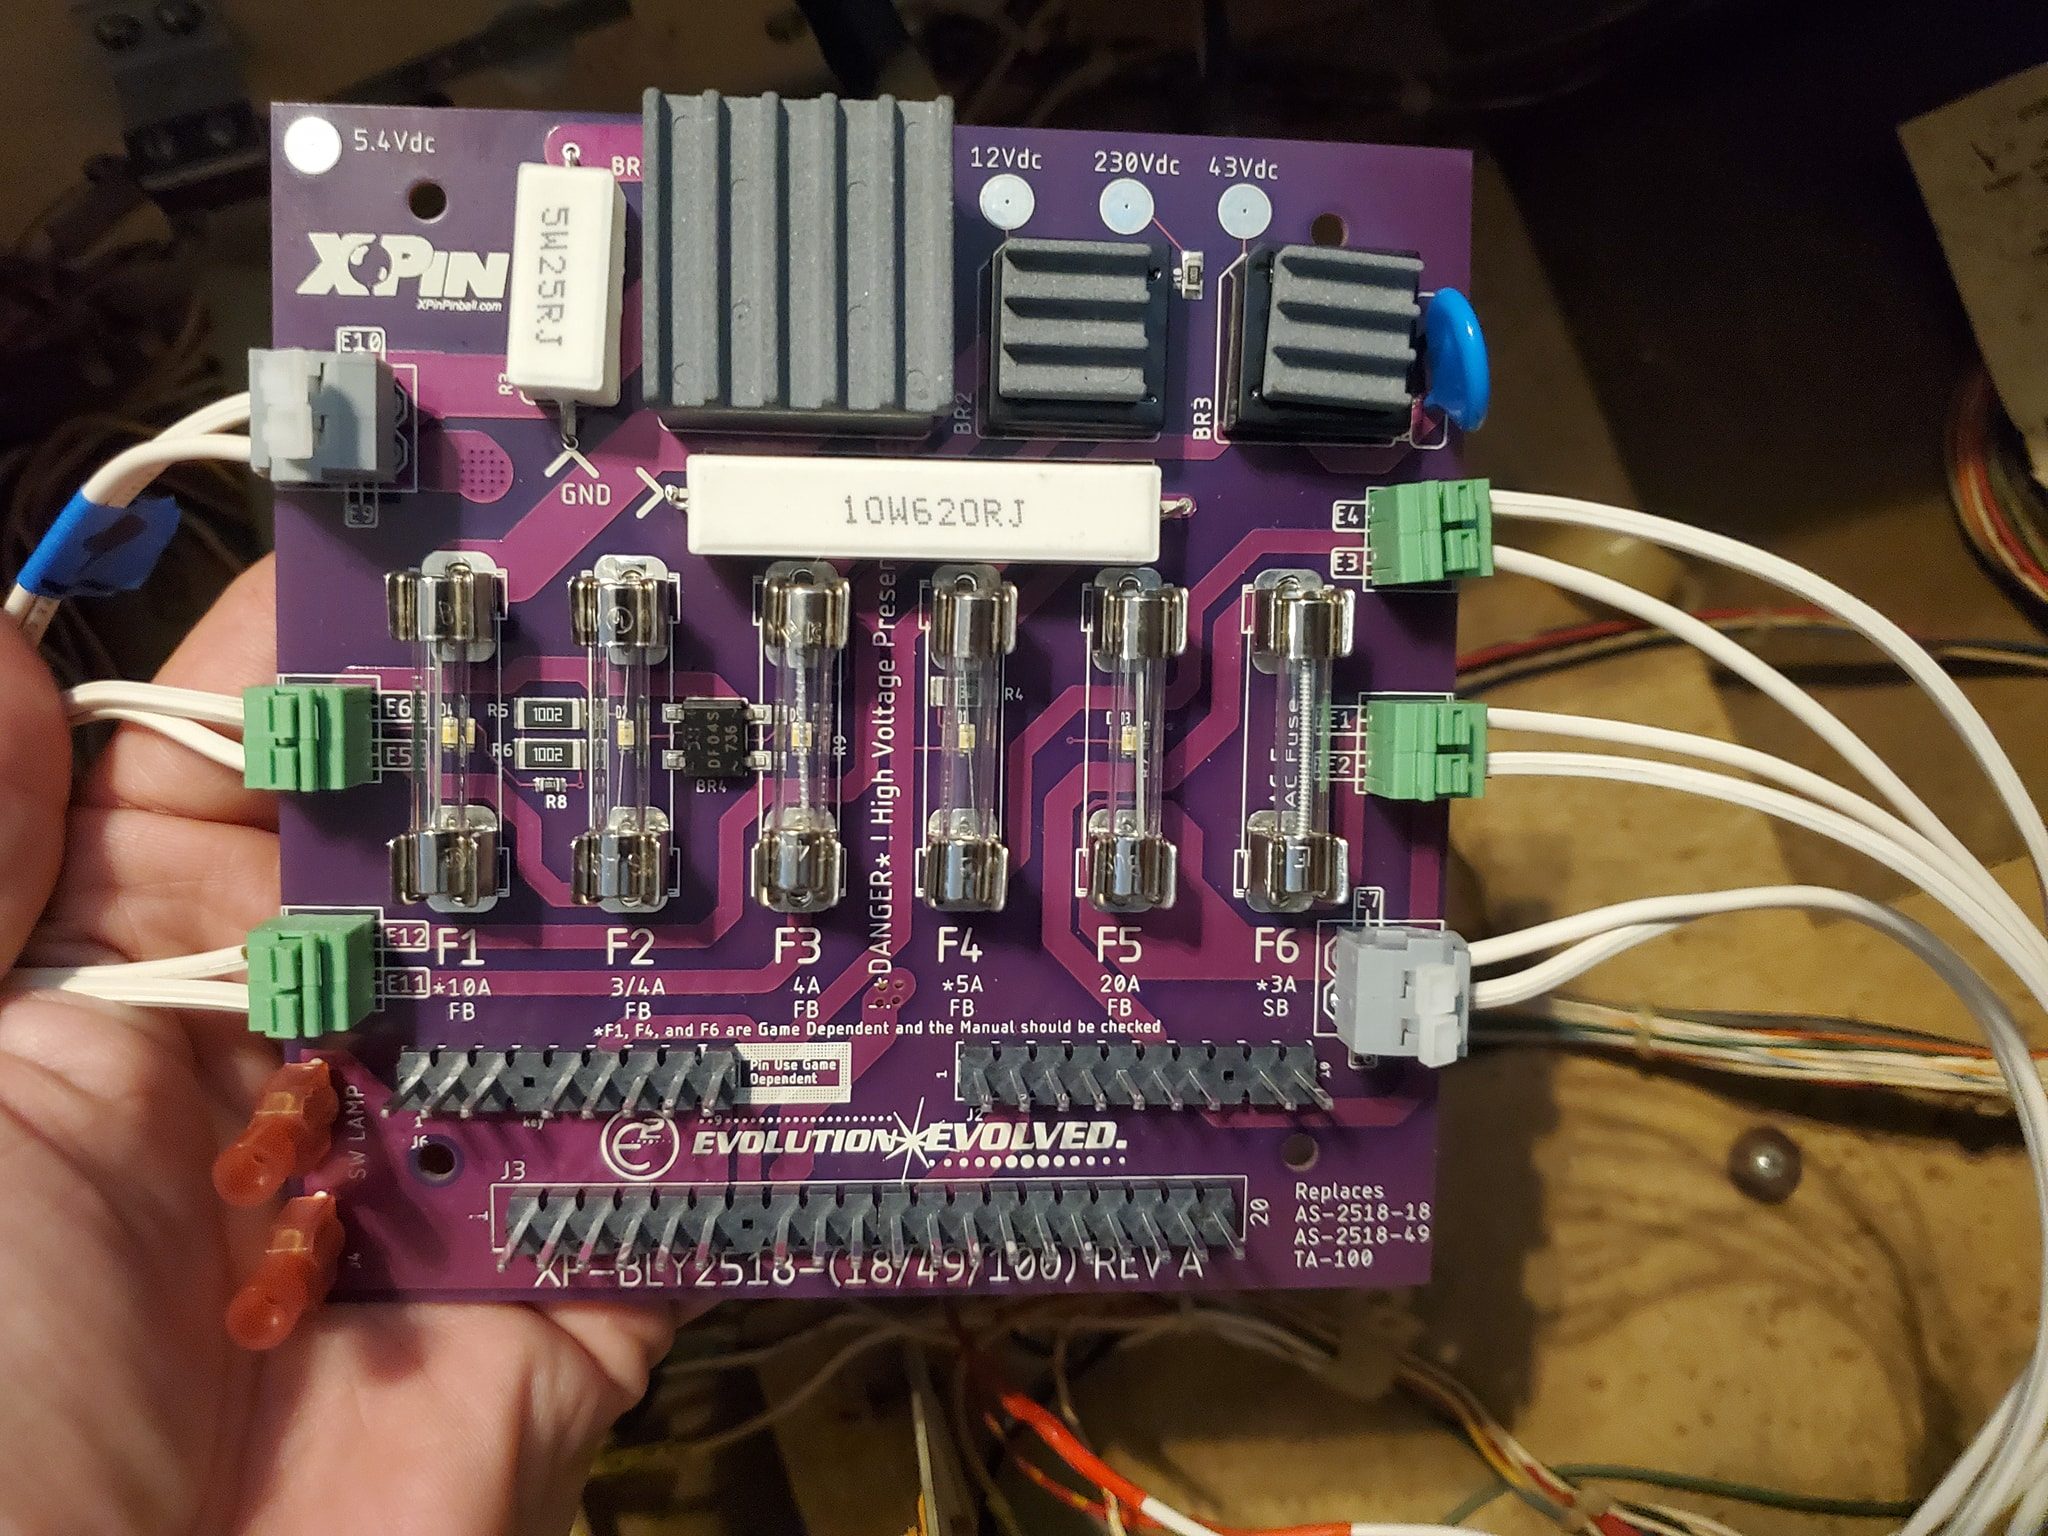
An examination of the schematics showed an area on the power rectifier board where it was likely some components were damaged and needed to be replace. Luckily, these were not very obscure items so I could pick them up easily.
Stay tuned for the next installment where I go into addressing an issue with a broken plastic rail guide that probably can’t easily be replaced, so I have to fabricate my own!