Today I’m testing some new LED displays that come from Australia.
These new LEDs are a drop in replacement for the standard high voltage displays, but use less power and look almost identical to the original displays.
They’re produced by Wayne Hamilton out of Australia. Here is where you can find his products:
Now that I’ve got Haunted House running, it’s time to bulletproof the game – ideally you’d probably want to do the ground mods from the very beginning because in some cases, you might not be able to get the game working otherwise, but in this case, I managed to get the game to boot and appear to play well, so now we’re doing the required ground modifications to make the game more stable and reliable.
What’s actually involved in that?
It’s pretty simple. Gottlieb used single-sided edge connectors (unlike Trifucon which has contacts on multiple sides) for most of their connections. Over time, these connectors tended to fail, either by the contact surface becoming oxidized, or the blades becoming fatigued and not making good contact. Since ground is so important, without a solid contact, the game can behave in a variety of different and unpredictable ways, from random reboots, to intermittent issues with everything from lights to sound to coil firing. The general rule with Gottlieb games is if you’re having a weird problem that isn’t consistently repeatable, there’s a good chance it’s related to the powertrain. The most obvious culprit in the power chain is going to be the ground/return lines.
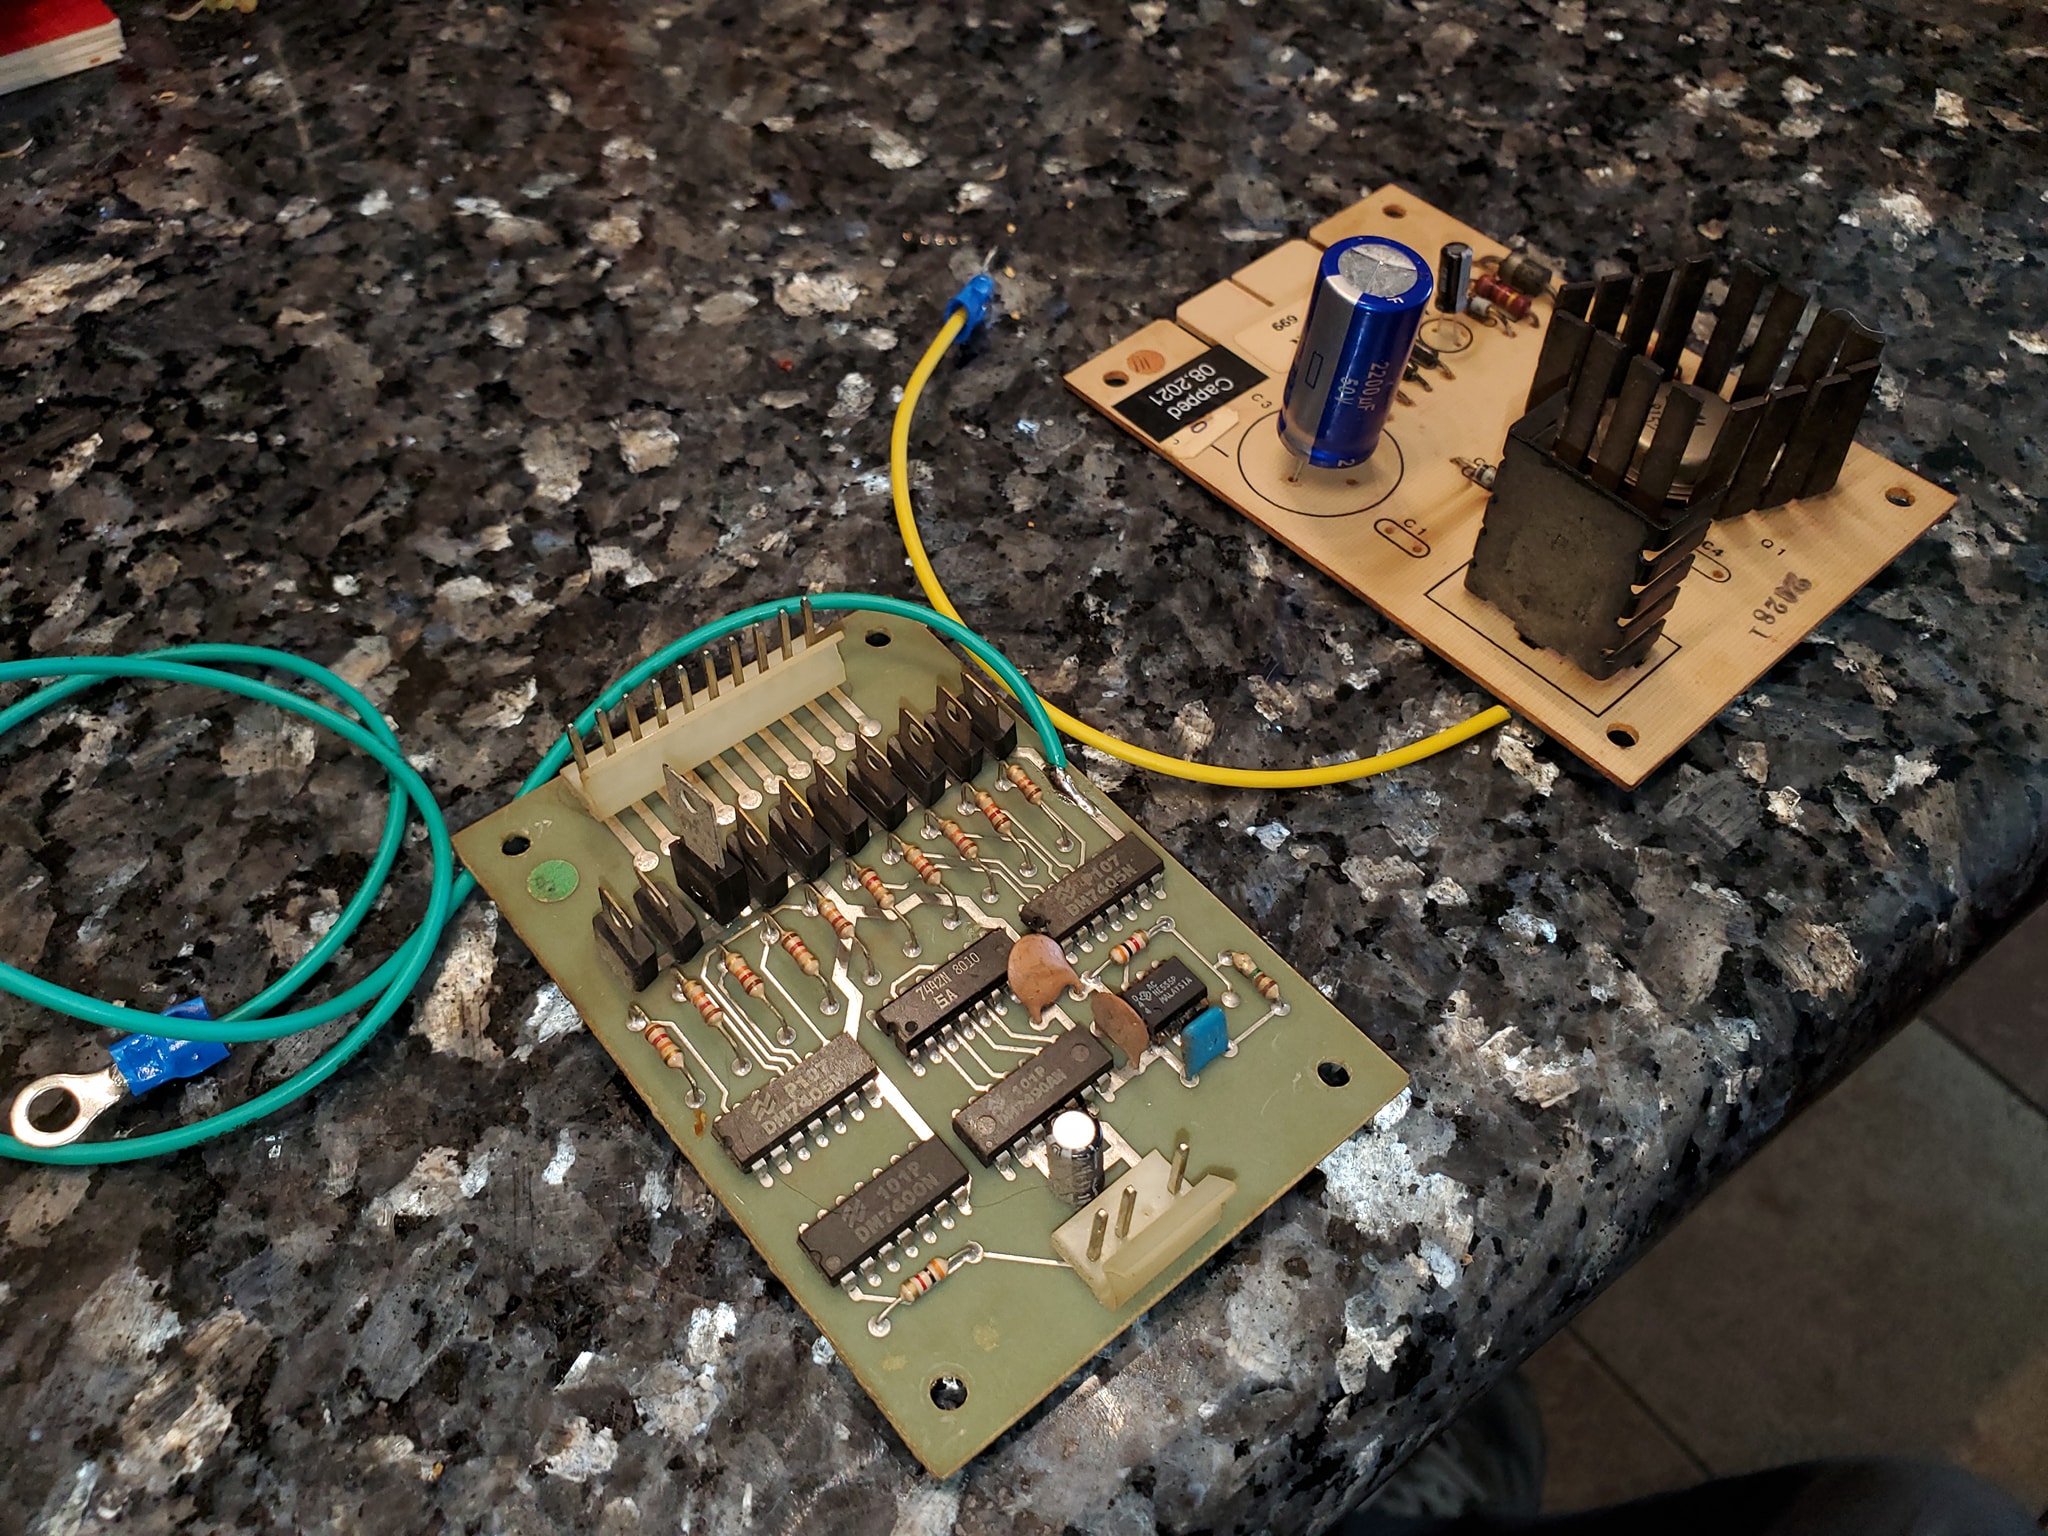
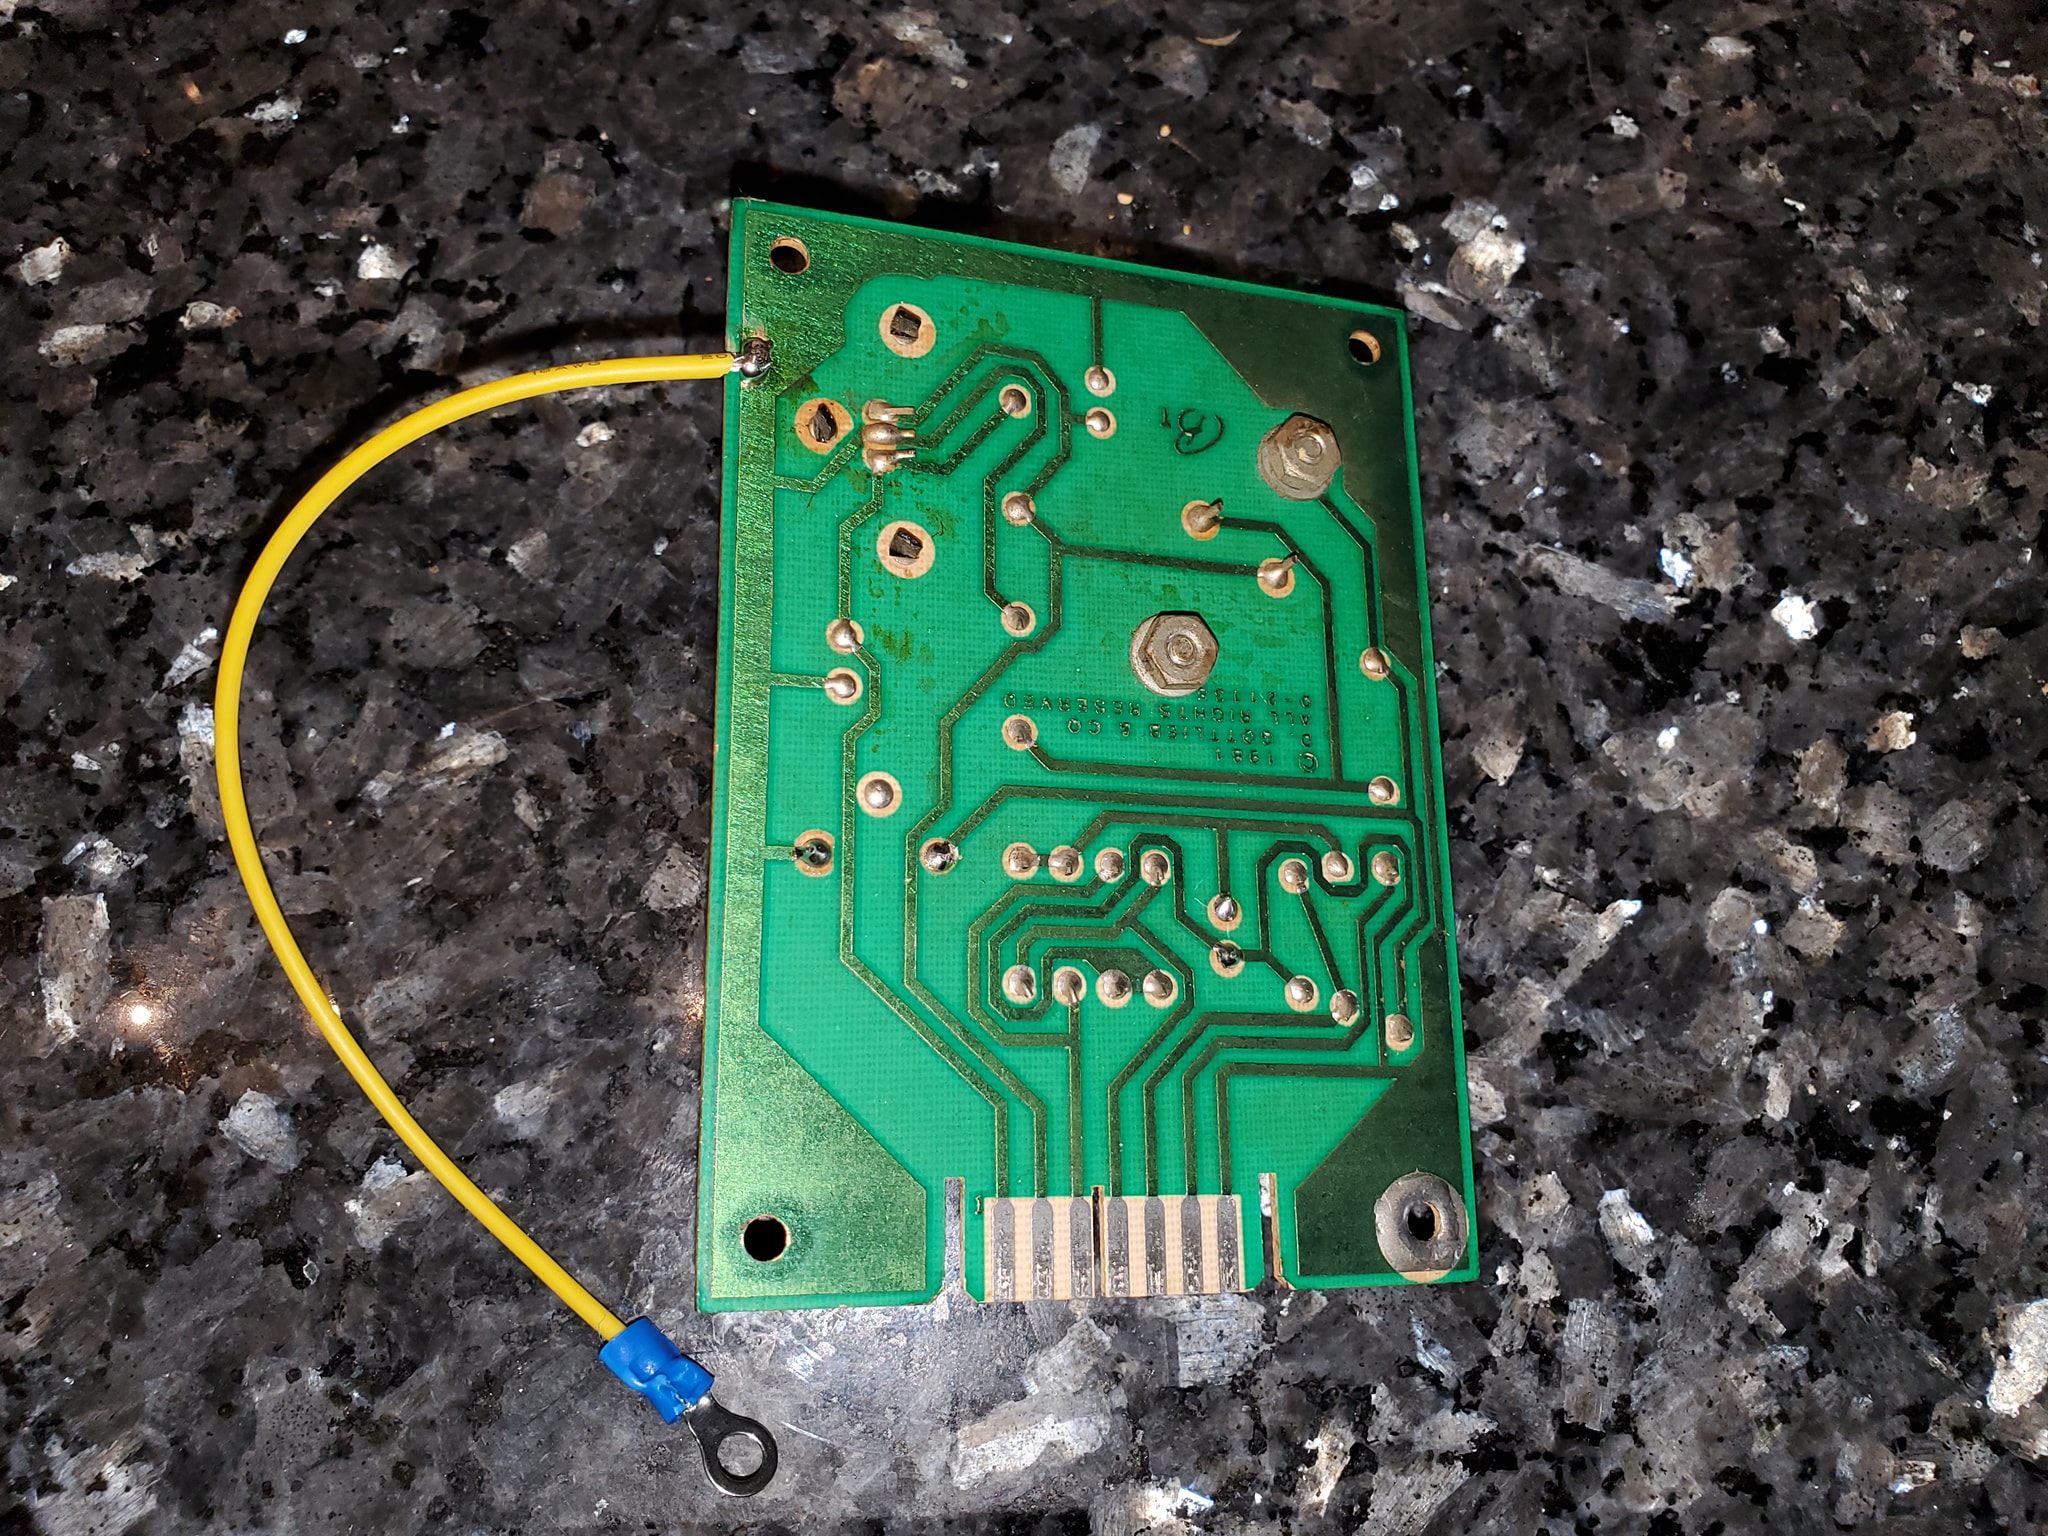
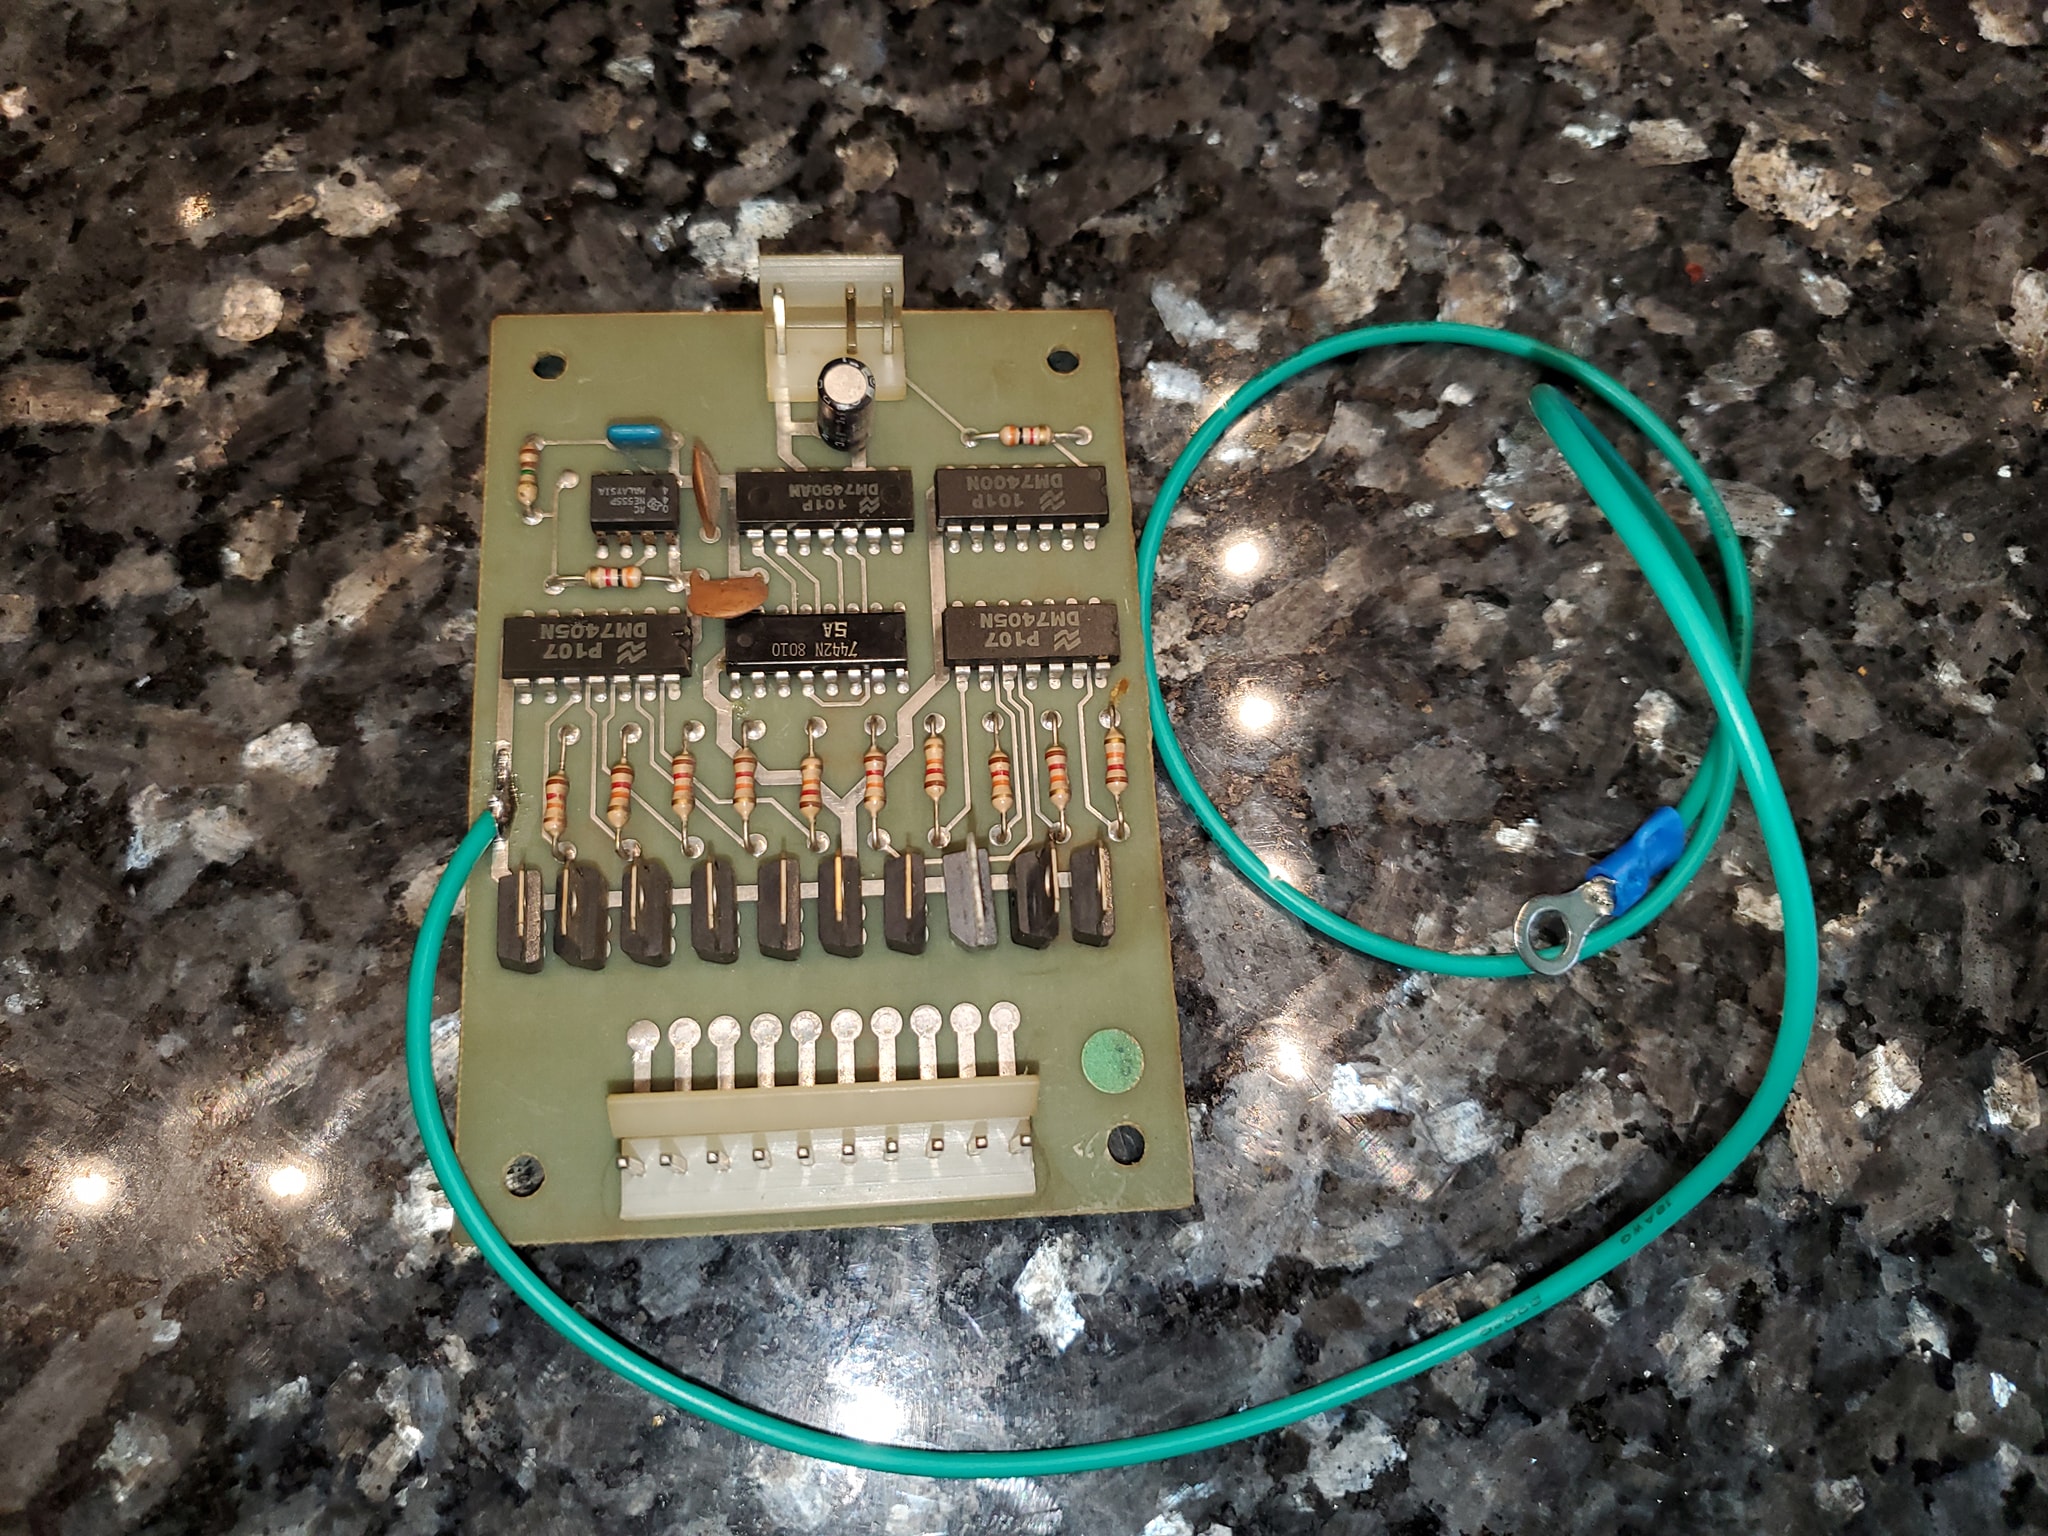
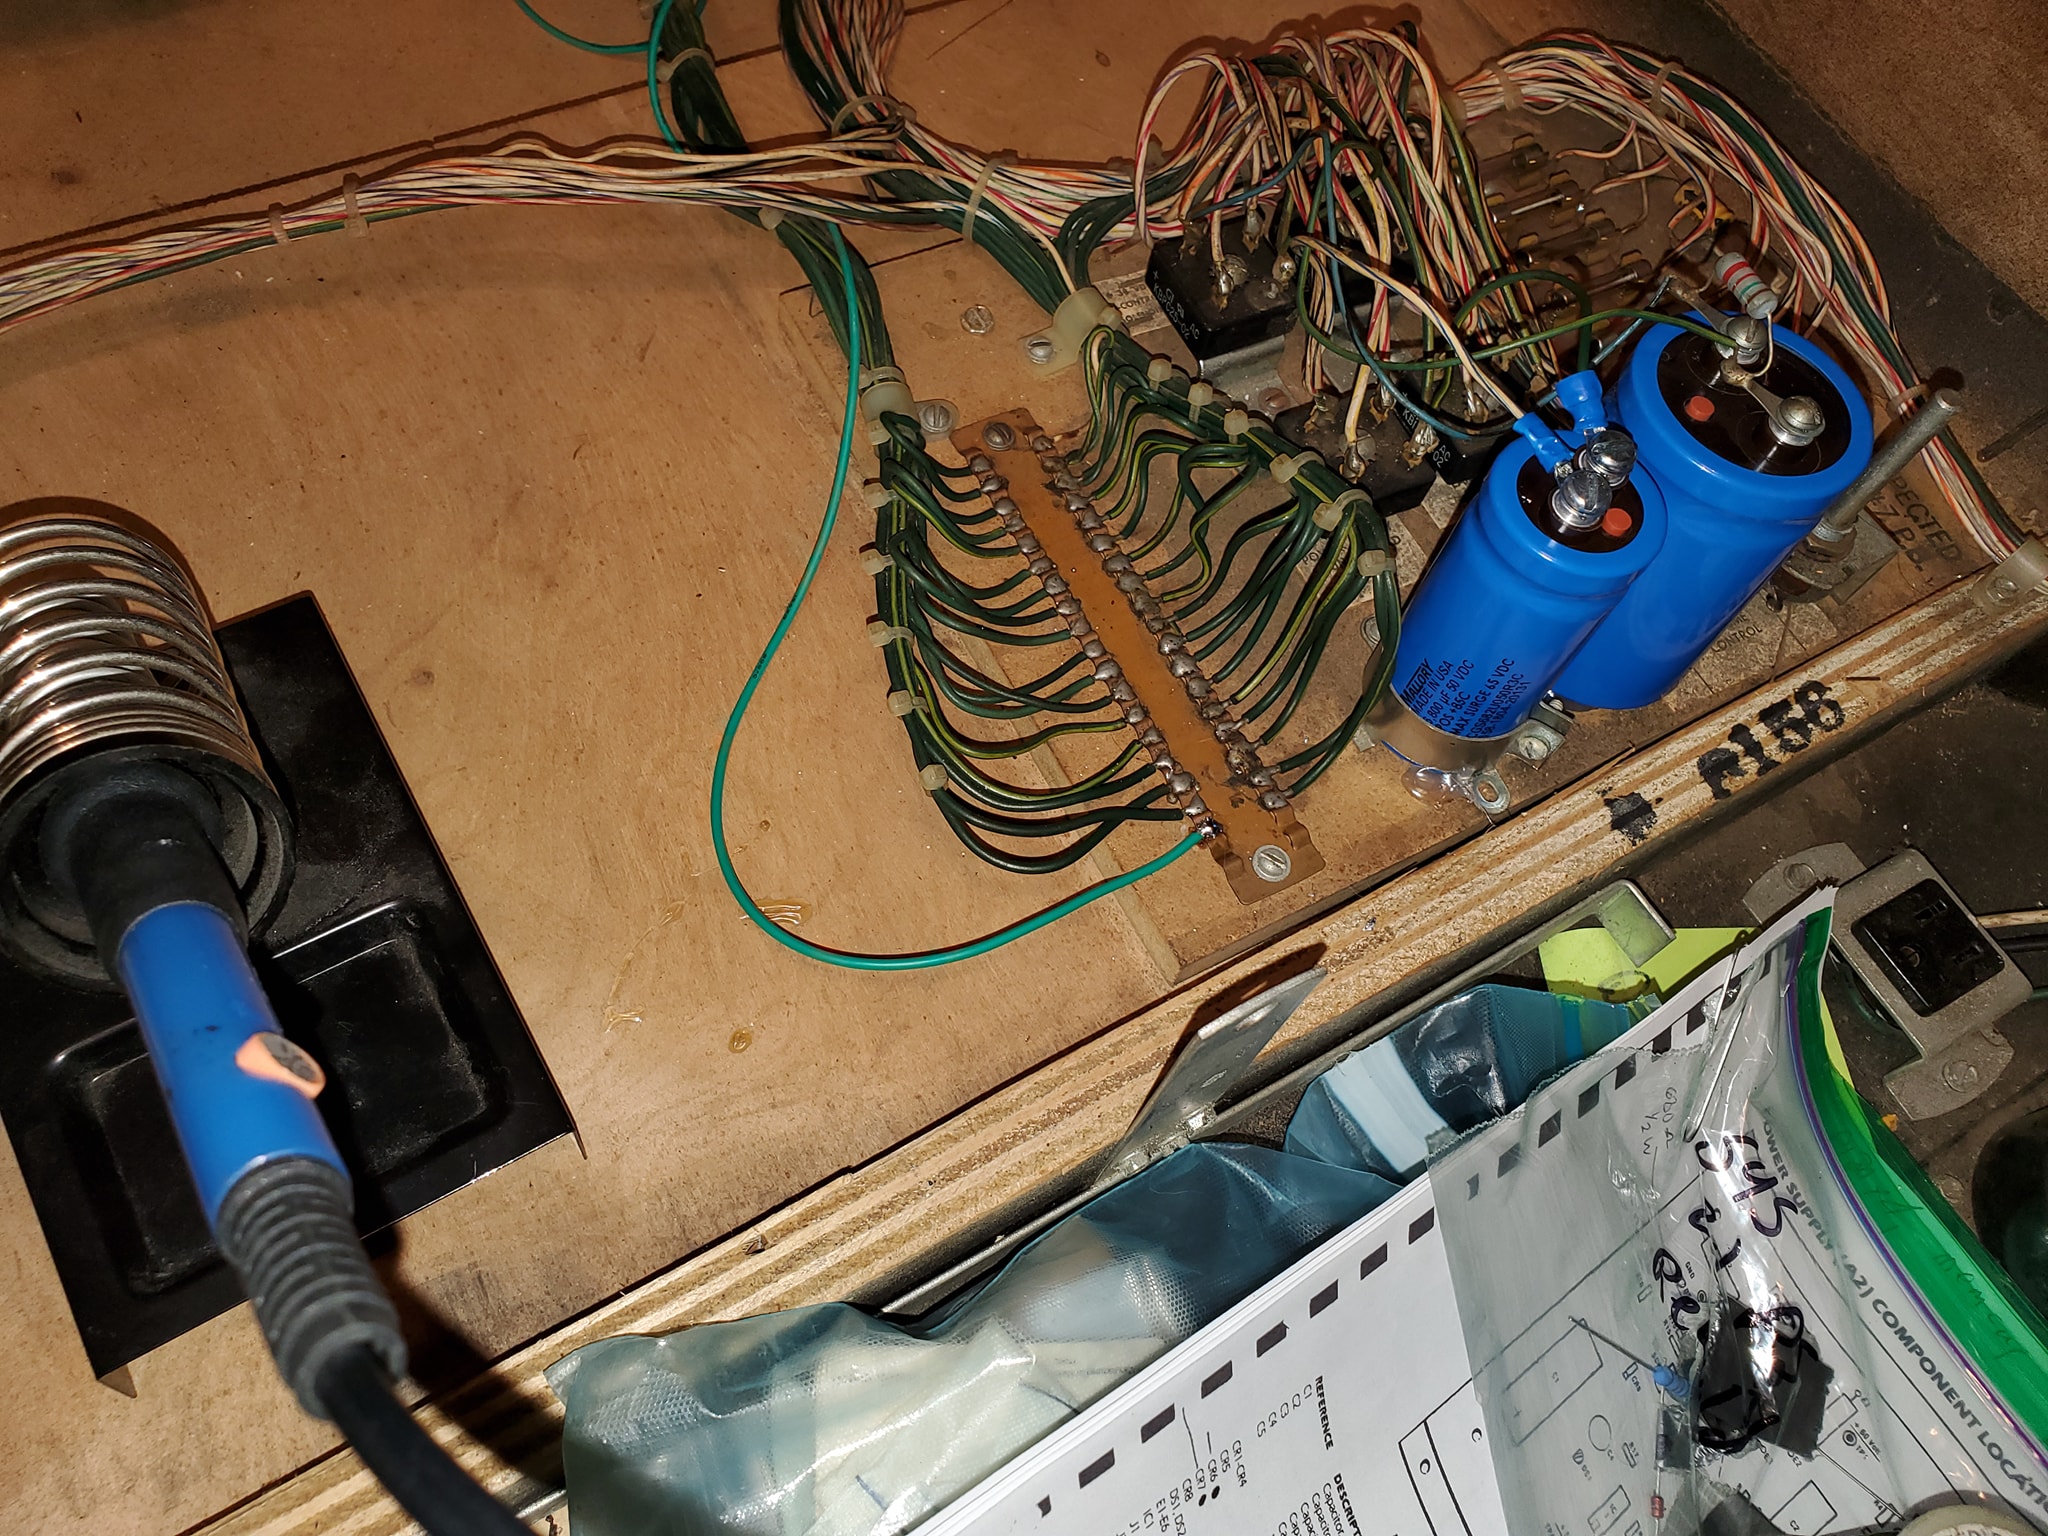
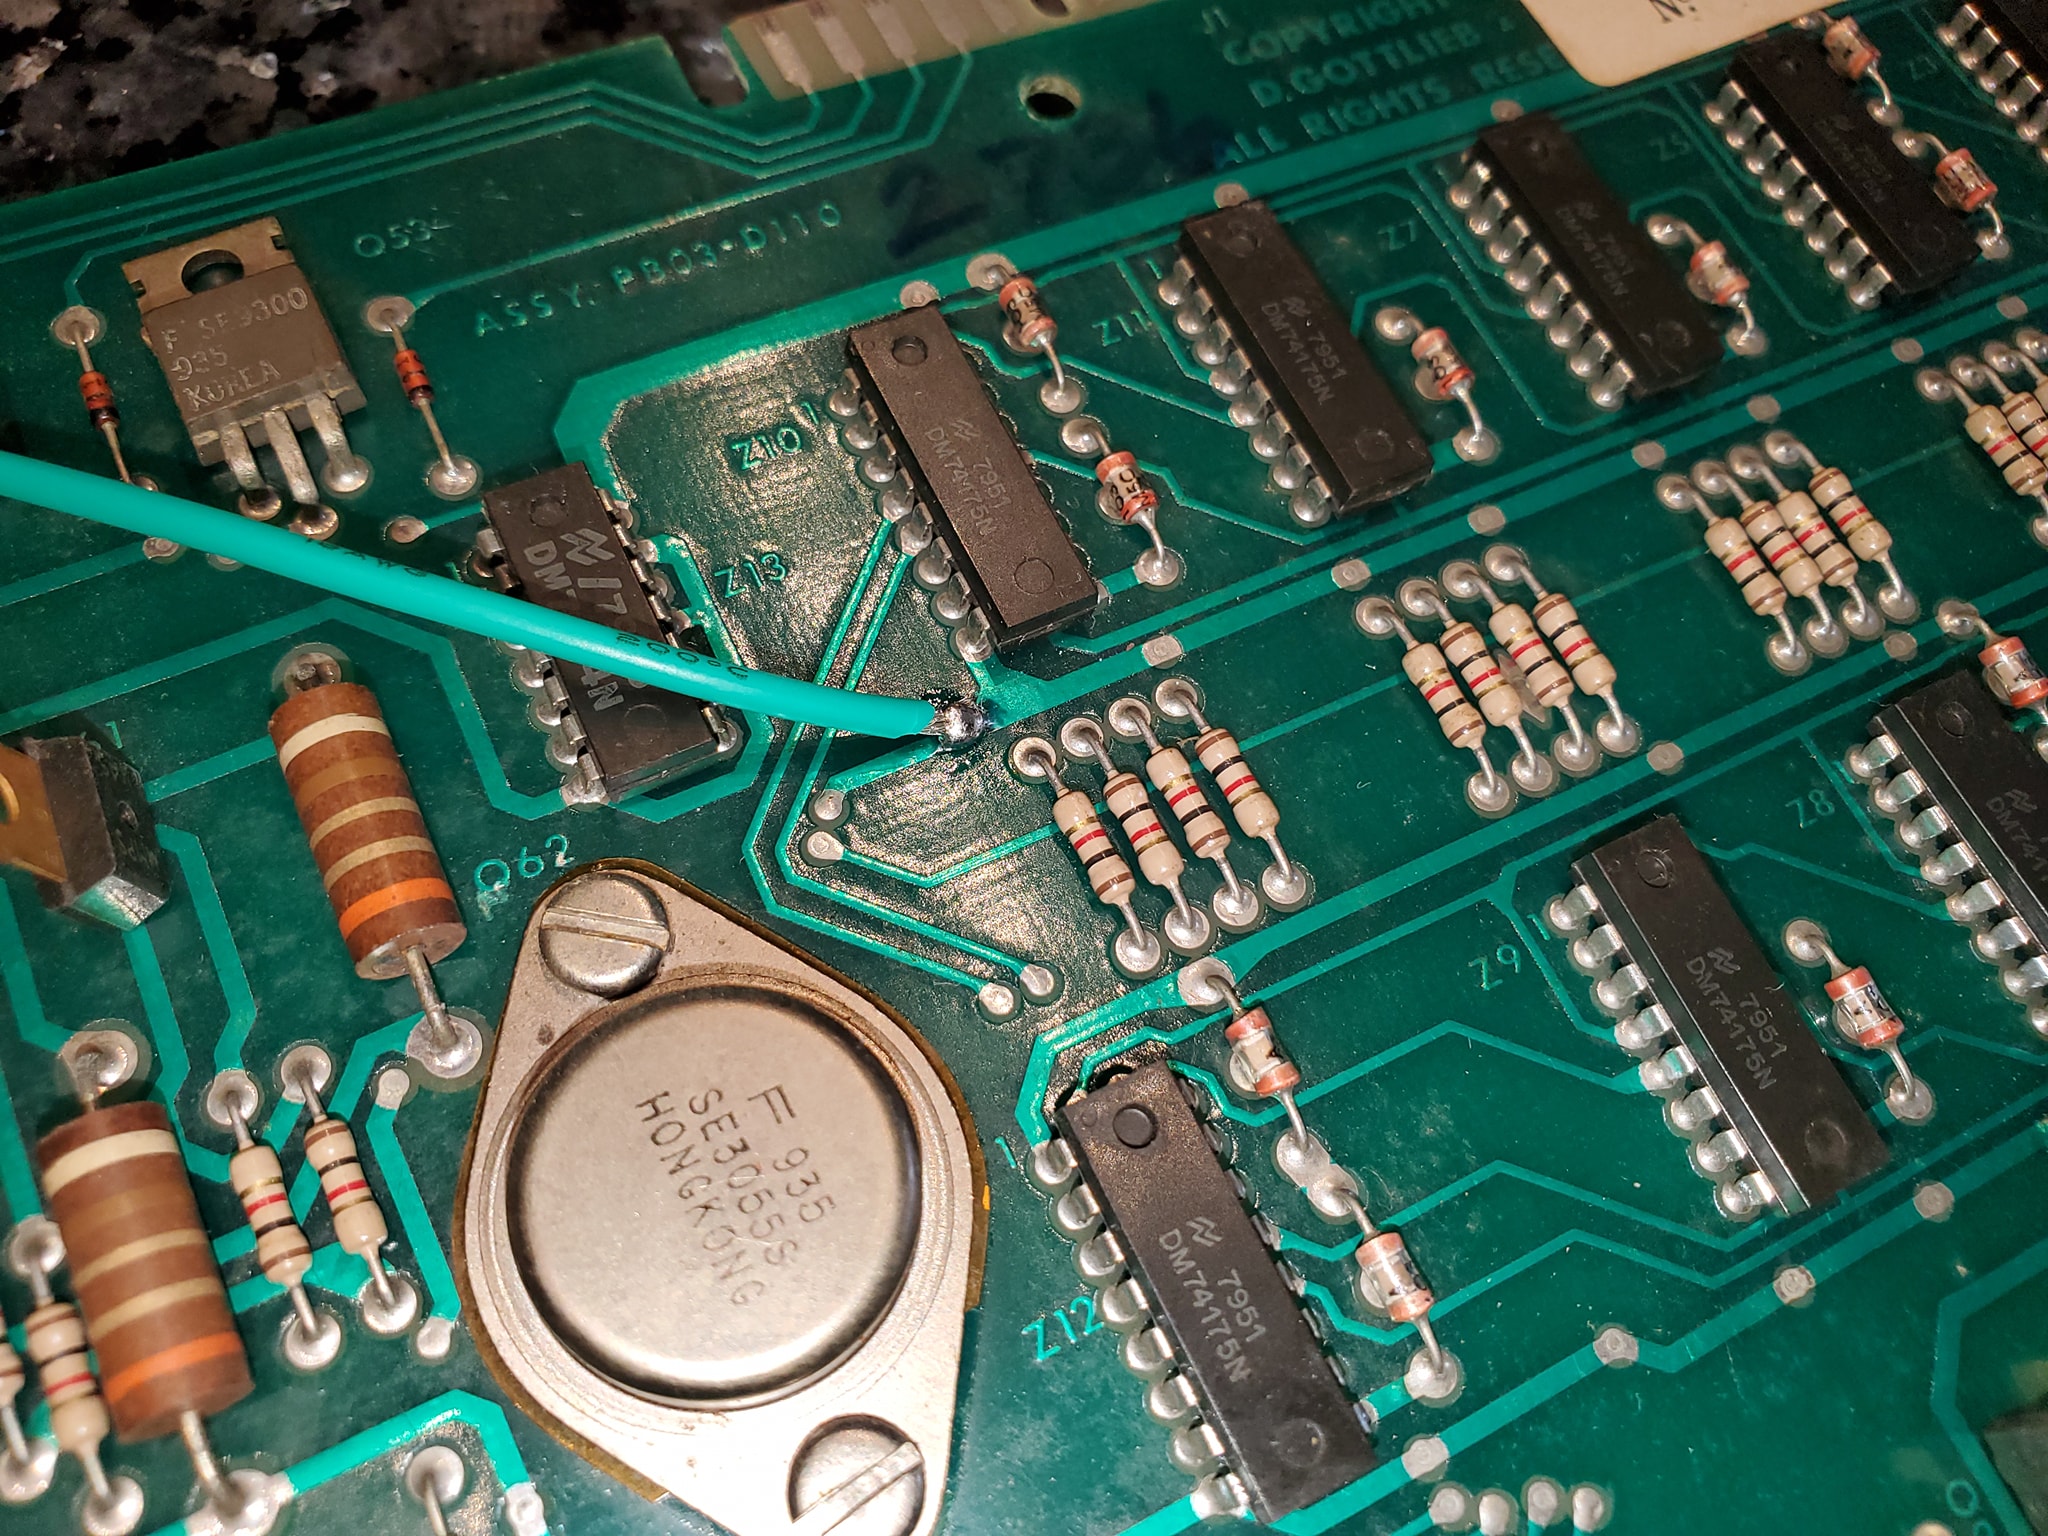
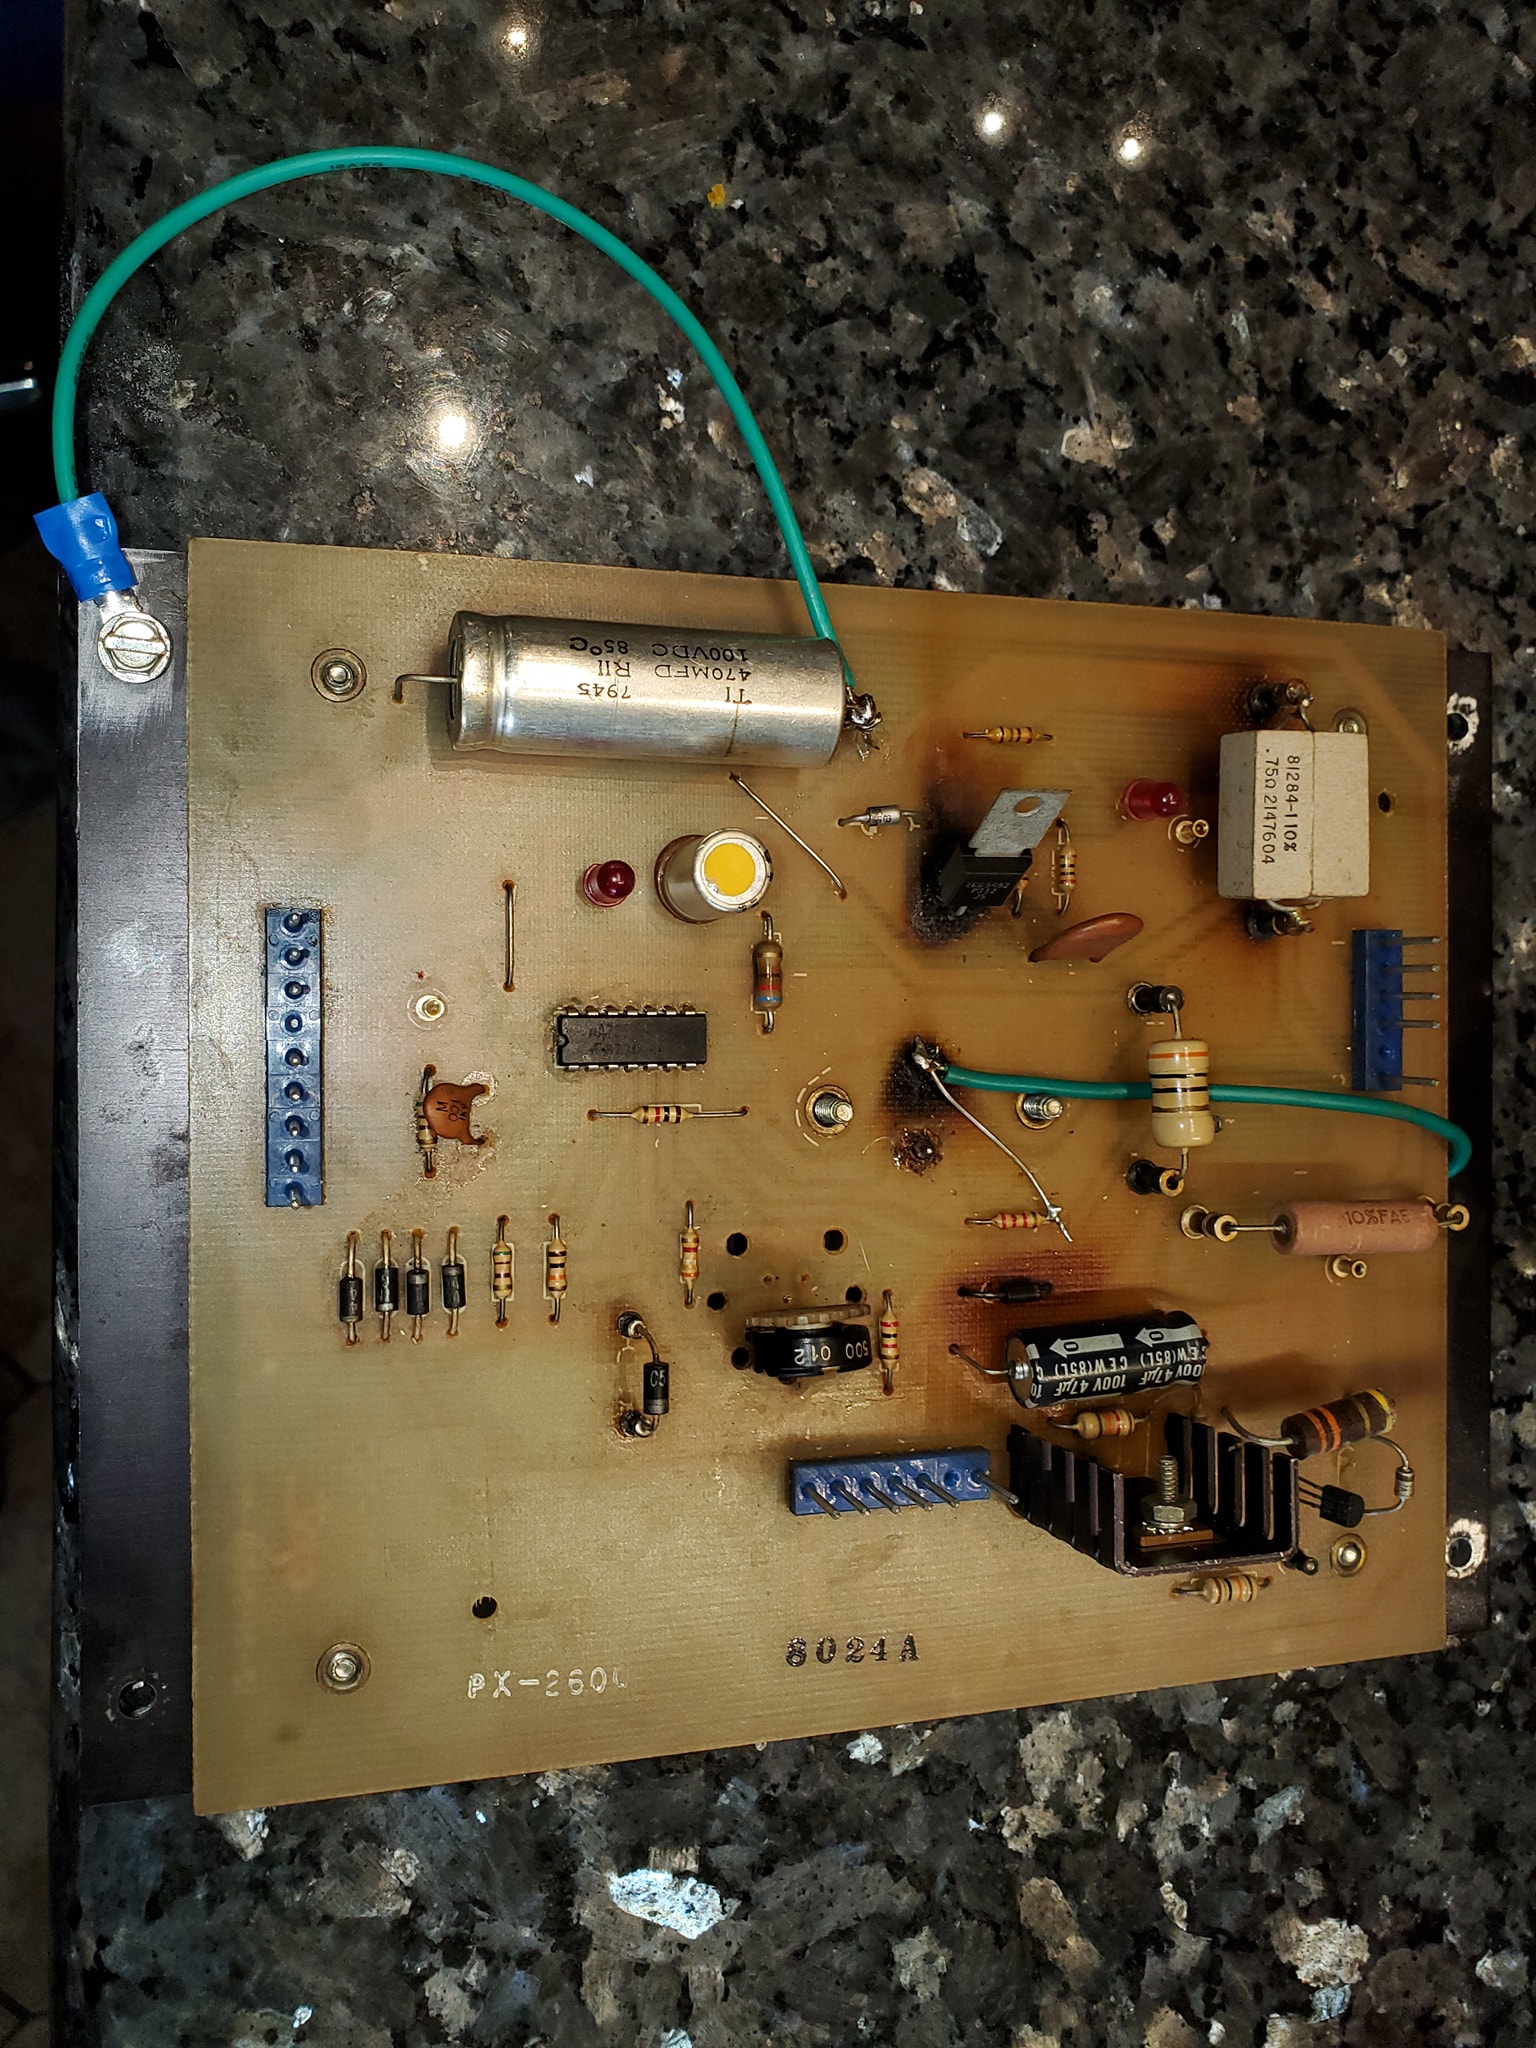
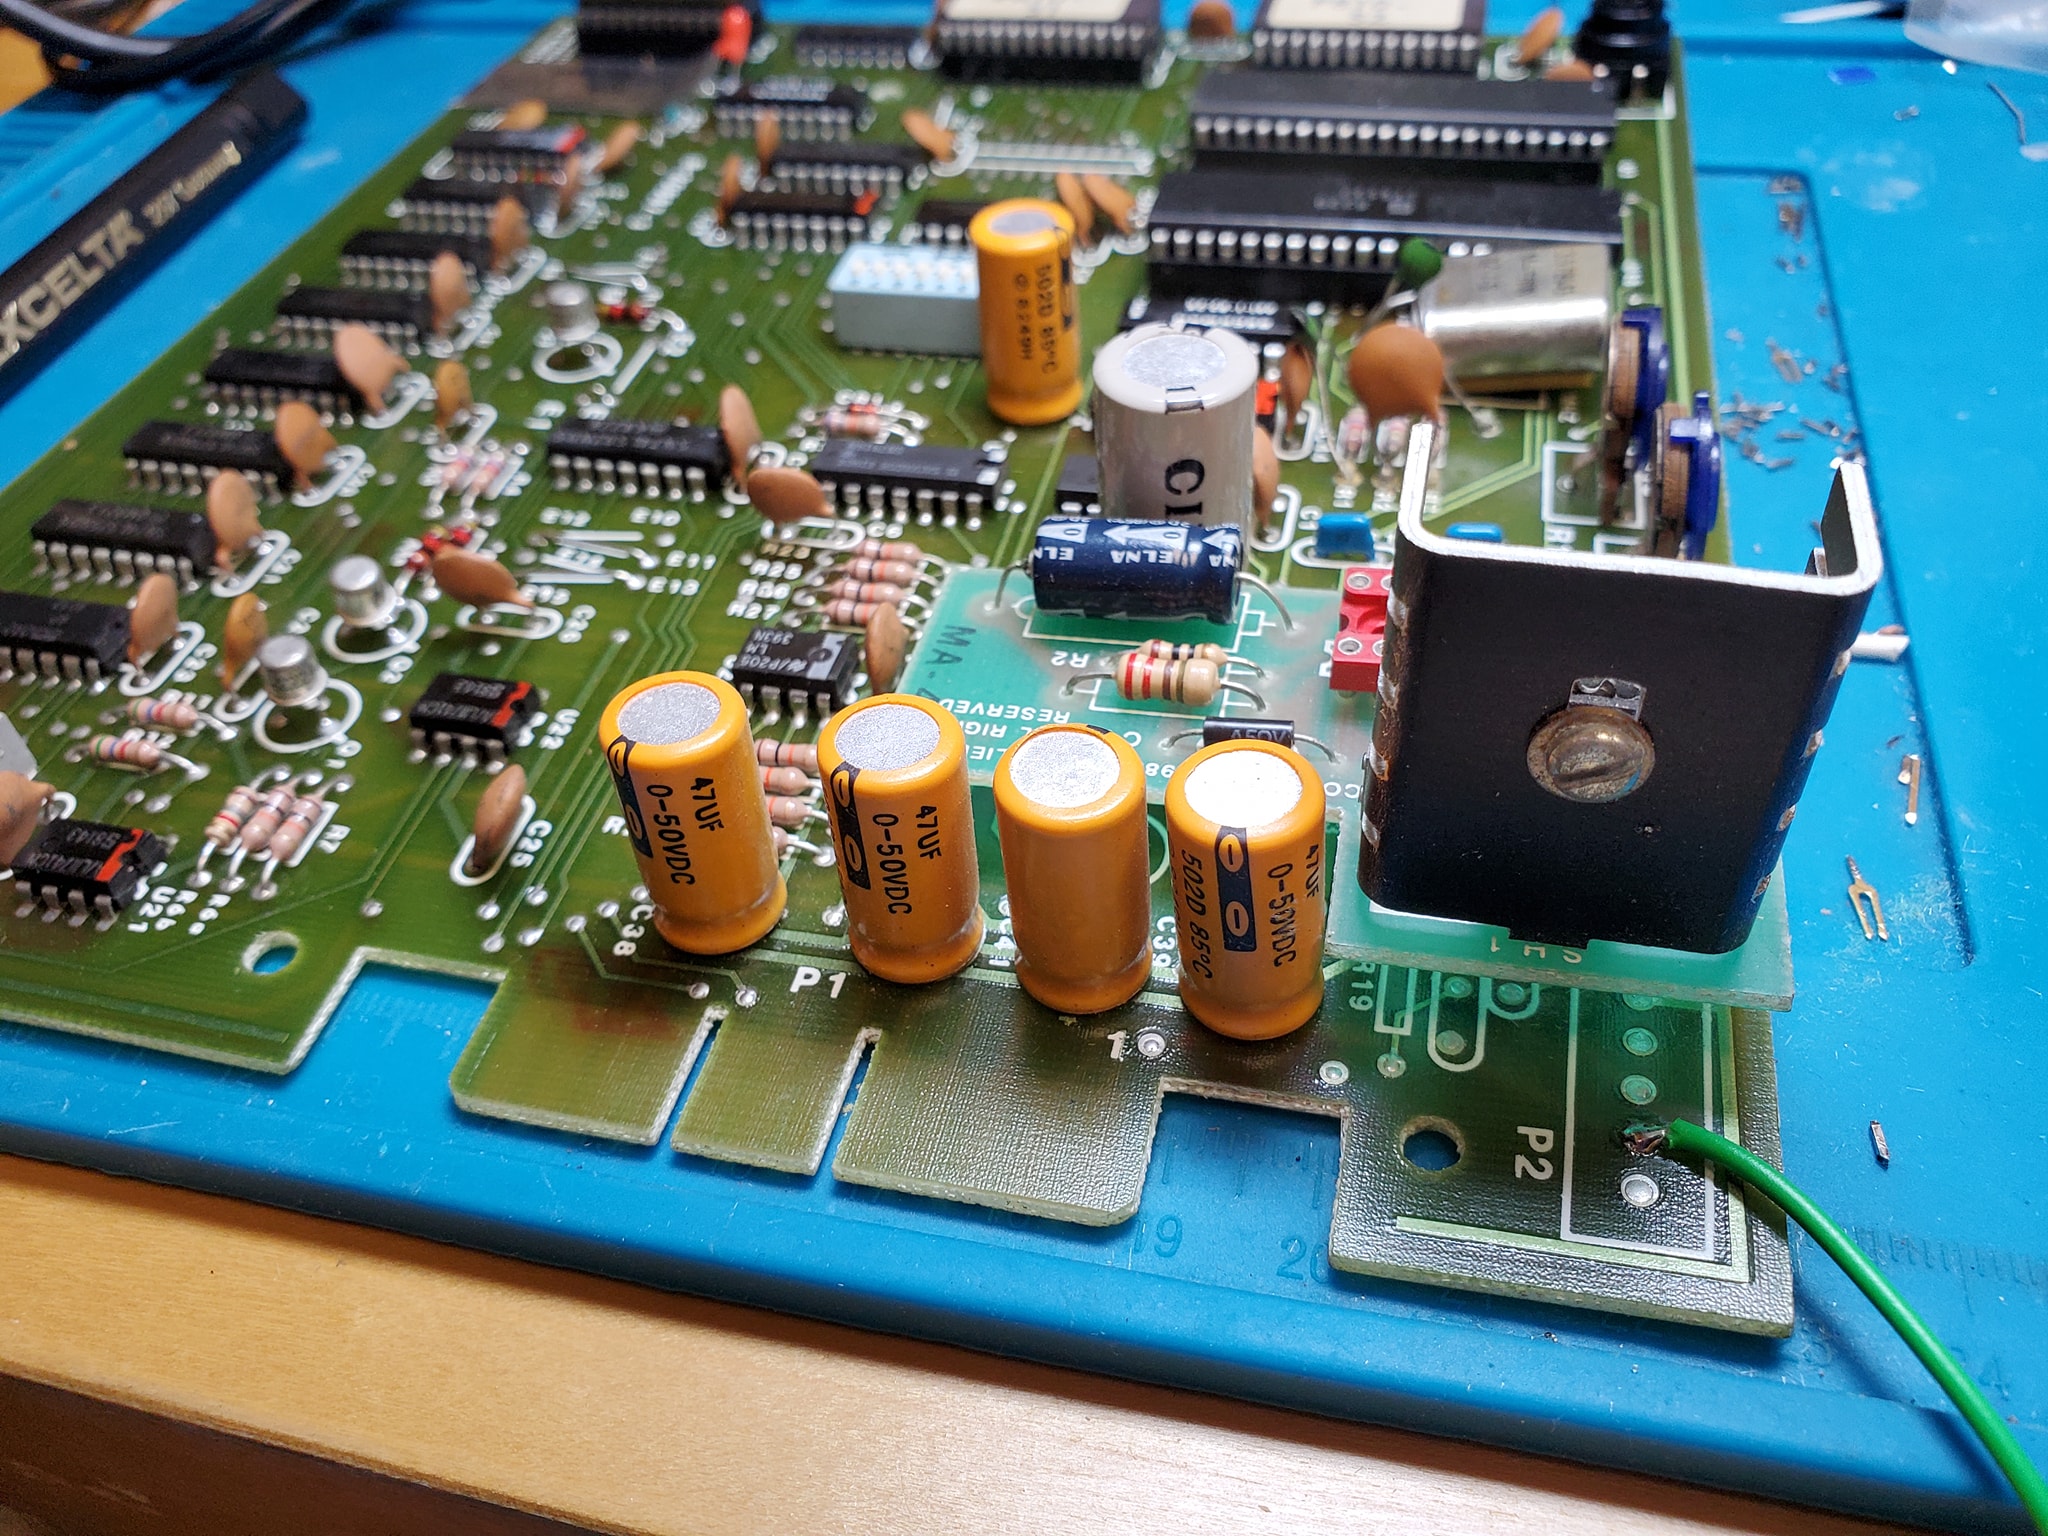
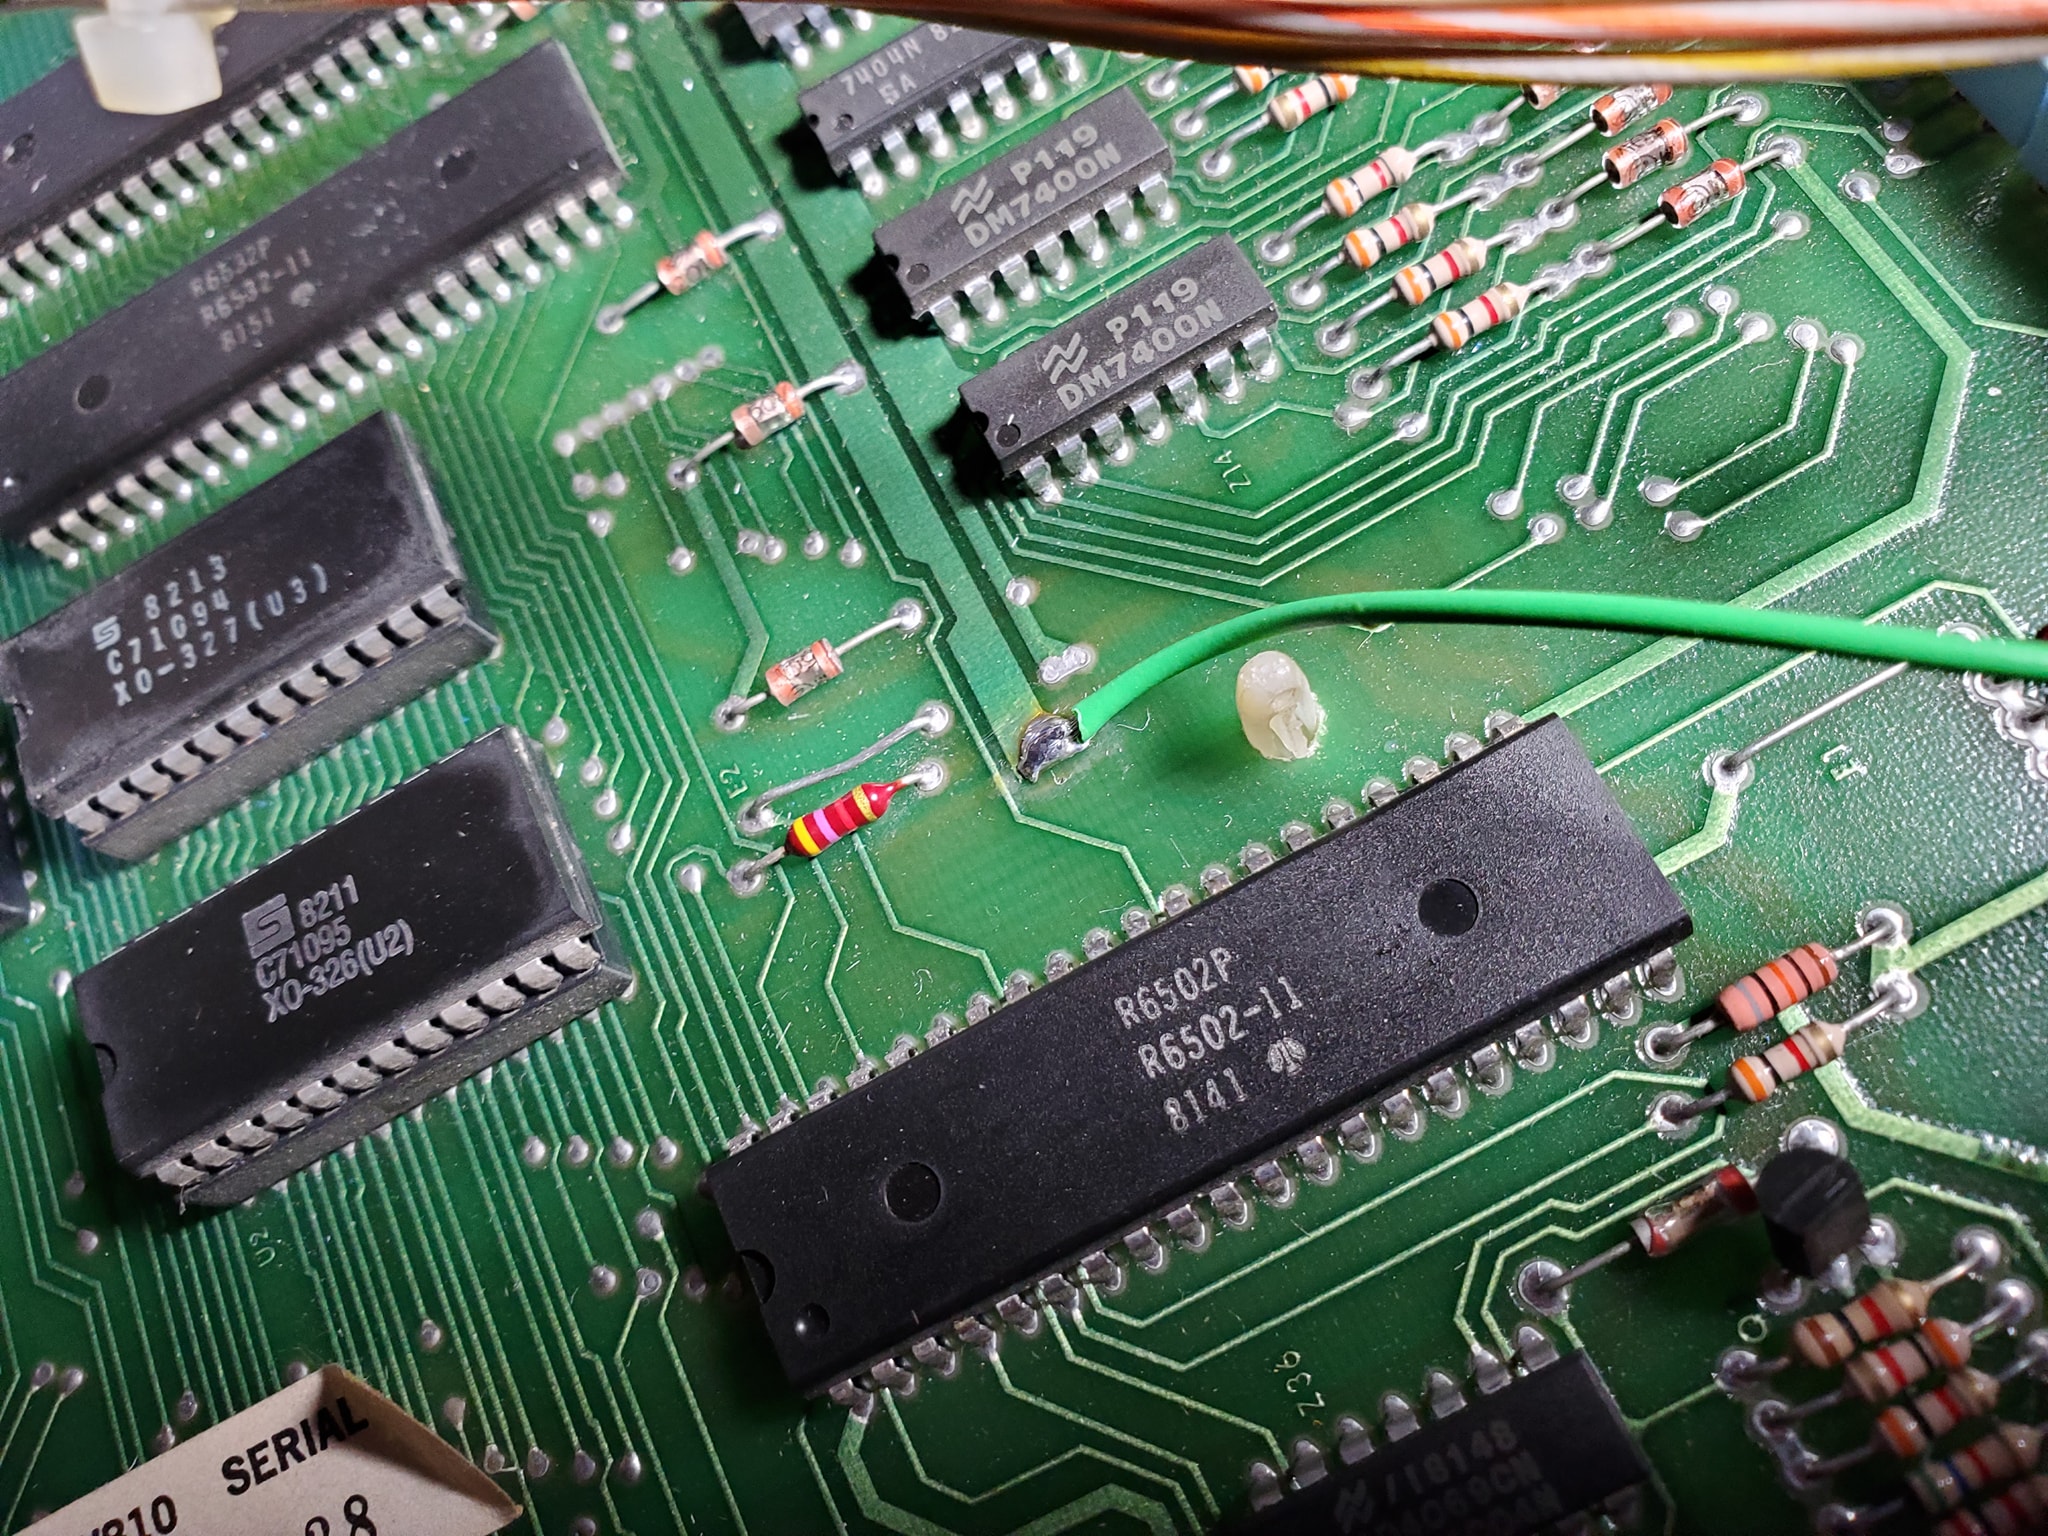
In-a-nutshell, the ground mods involve running an extra ground wire to tie all the different board’s ground lines to a common ground, and tie the head and the cabinet ground lines together — the only exception is you keep the 45v solenoid ground line separate (this is to ensure that if there’s a coil short, it doesn’t send high voltage to the rest of the game’s more sensitive components). Each board has a different recommended spot where you should tap into the ground, often it’s near one leg of a capacitor (which should also be changed if they’re original). Use 18 gauge wire (preferably green colored) and tap into each board with one end in the designated spot, then crimp a spade terminal on the other end and tie all the boards to a single ground plane (usually the metal bracket that mounts the power supply in the upper left corner — be sure to sand the paint off the area so you can make contact (alternatively you can also solder directly to the bracket.
Once you have all the boards tied to a single plane, you want to tie that to the head and the cabinet, by running wires from the power supply bracket to the metal frame in the head, and then one down into the cabinet to the transformer board, where you’ll find a ground backplane you solder to (on System 80B games, you’ll also want to take all the ground wires that terminate on the transformer board and tie them together, preferably eliminating the molex connectors they used which cause problems).
Click at the top of each image below for larger versions:
All the boards with mods – note the mpu board ground mod is to the top part of the capacitor on the left middleGround mods to the aux light board and sound card power supplyunderside of the sound board power supply showing ground tapaux light board ground tapNote the light green wire – this is the new ground line from the power supply bracket in the headground tap location on the driver boarddriver board ground tap completedlocation shown where protective coating is sanded off to solder ground tap on driver boardtap from MPU to main ground plane / power supply boardRecommended Gottlieb System 80 ground modifications – power supply boardSound and Speech board ground mod tapAlternate ground mod location for sys80 CPU board
Here is a short update on the progress with my 1979 Bally Paragon pinball machine with custom rules and sound. The game is close to being complete. Take a look!
I’m now at the point where I’m getting various feedback from players about the content. Most people like it, but some seem to think the music is a little too “mellow” given the theme? I can see that. I wanted to do something a little more stylized and different. You’d probably expect some kind of dramatic orchestral score with the game, and not a kind of funky prog-rock type of music. So I’m torn on whether I should keep it or change it? I’m going to talk with the artist and see if he has any ideas — maybe we might record something specific for the machine? I don’t know, but I do like the idea of using a real band that we’ve actually recorded – so every sound in the game was completely created. Let me know what you think?
After getting my Trident operational, I installed the BSOS system and have been working on fine-tuning the custom code and sounds. Here’s a short demo of what the new Arduino-based controller does to a standard Bally 18/35/Stern early solid state game.
Resources (courtesy Dick Hamill):
The code is all available on GitHub. It’s broken down into a base library and then machine-specific implementations. Rewriting other games requires a moderate knowledge of C/C++. https://github.com/BallySternOS
Here’s a suggested parts list. If you bought all these things, you could create 6 of these boards. If you don’t need that many boards, you might find cheaper ways to source smaller quantities. I haven’t done any work to figure out if this is the cheapest way to source any of this stuff.
Cheap Arduino knockoff x6 ($20.99) – needs CH340 driver for programming / has to be ATmega328P https://www.amazon.com/ATmega328P-Controller-Module-CH340G-Arduino/dp/B08NJNJCTX/
0.1″ 40-pin connector (40 pieces for $7.99) https://www.amazon.com/Honbay-Single-Female-Connector-Arduino/dp/B06Y4S6G29/
32-pin Prototype PCB (2 pack for $9.99) – this won’t work for Alltek or MPU-200 because they have a 34-pin connector https://www.amazon.com/Prototype-Snappable-Arduino-Electronics-Gold-Plated/dp/B081QYPHHP/
Wire ($7.99) – tons of wire https://www.amazon.com/REXQualis-Breadboard-Assorted-Prototyping-Circuits/dp/B081H2JQRV/
Boot switch – x2 ($8.99) this switch will work for activating the Arduino board and toggling the speaker (see the writeup here to find out why: https://ballysternos.github.io/install.html) https://www.amazon.com/gp/product/B07XMH174C/
I found this old video the other day and realized I didn’t have a post on my main site showcasing this video so I wanted to add it (also, this was before I learned the proper pronunciation of “Bally” LOL…. bah-lee).
These days modding games is all the rage: adding fancy toppers, custom lighting, subwoofers and powered speakers and more. But many pinball machines don’t have a facility for you to plug in extra stuff in your game. Many games do have a “service outlet” inside the game, but this is what’s called “un-switched” meaning it’s on all the time – mainly so technicians can use a soldering iron on the game with the power off. In this video I go over the process to tap into the switched power lines of the game to add your own extra outlet(s) that come on when you turn the game on.
This is a neat way to add extra art and visual appeal to your pinball machine using what are called side art blades. This is an area where many third party artists & entrepreneurs are finding clever and creative ways to mod pinball machines to increase their value and appeal. I talk about this and show you some examples.