Fixing slingshots and coils that don’t fire on Williams System 3+

In this video series, I go over a 1979 Williams Flash pinball machine that has a few issues. After rebuilding the sound card and getting the sound working, I move on to figuring out why several of the playfield features are not working. I go through step-by-step trying to figure out where the problem is and why certain coils are not firing, eventually tracing it all back to logic chips on the driver board. Watch me as I fumble my way into getting the game back to 100%, and as usual, pardon my occasional tangents and erroneous conclusions as I diagnose where the problems are in this un-edited video series.

flash_ic
In Summary, there are a few steps to follow when you’re trying to diagnose a playfield coil that does not properly fire.

First, as always, make a visual check of the playfield and connectors to see if you notice any obvious problem like a broken wire or diode, coil winding that has come loose, or an obviously burned coil, or cracked/loose solder joint.

Second, check to see if there’s power to the coil and it can be manually trigger by grounding the non-power-supplied lug.

Third, go into coil test mode and see if the coil can be fired from the diagnostics. (if it can but not in game play, it is likely a switch problem)

Forth, trace continuity in the switch matrix wiring to/from the playfield. Also note (as I later discovered while working on this game) that if the coil is using one of the special solenoids, it will have a second trigger switch/line that needs to be checked.

Fifth, if continuity checks out, then test the switch matrix or trigger lines on the driver board.

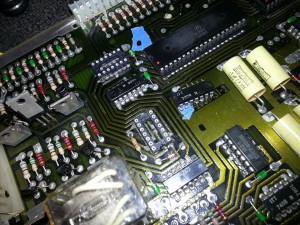
If you’re at this point and things still don’t work, it’s time to examine the driver transistors and pre-drivers… you should have, at step 1, examined the driver board to see if there were any obviously burned components on the driver board. Now you have to bust out a multi-meter and check the transistors and ICs in the signal path — noting that if they test good, this dosn’t mean they necessarily are good.

If there still is no conclusive cause, you have to start replacing components, starting with driver and pre-driver transistors, and then the 7408 and 7402s.

Fixing Bally -35 reset issues and bullet-proofing the power driver board

I was having an issue with a Bally “Supersonic” pinball machine randomly resetting/rebooting. The problem was traced to irregular power coming off the driver board. In this video series I go over a necessary process to bring these old boards back “up to spec” as well as a few improvements that make the game overall more reliable.

First Look: 1978 Bally Supersonic – damage done by batteries takes its toll

Today’s I’m looking at a 1978 Bally “Supersonic” pinball machine. A friend had this in storage for a long time. While the game was in pretty good shape for its age, the original MPU board still had the battery on it, and the electrolyte from it leaked all over and damaged many components. Here’s a first look at the game.

Fixing stuck drop targets on a Bally SS pinball machine (Mystic)

This is another one of those video series where I thought to myself, “If I were smart I would edit this.” But then I thought, I can’t be the ultimate pinball repair guru and I’m not really trying. If I have some kind of “angle” it’s that I’m doing a FPS (First-Person-Shooter) perspective to the hobby, collecting and restoring. And often times when you’re in an FPS, you poke your head down the wrong hall and get fragged. This is kind of how this video series starts off but it takes part 3 to realize the plot twist…

Ok I’ll get off confusing metaphors and back to pinball repair..

The problem I had was when I got this Bally Mystic, one of the targets was broken. I had ordered replacement targets. I opted for the same style as the side targets even though on many Bally Mystics, for some reason, the front targets are bullseyes and the side targets have explosion graphics on them. Go figure? Anyway, after replacing the targets I discovered that two of them would often get stuck in the “up” position and would often not retract when hit. I knew the springs on some of the targets were old and had “lost their zest” (that’s an official technical term by the way). So I thought I’d make a video on replacing the springs, showing an alternate source for some of the components as well as a trick to make an old spring kinda new. Along the way I discovered the real reason why the drop targets weren’t resetting…

The aftermath of an incomplete Bally-MPU board repair..

In taking an initial look at the latest game I picked up, this Bally “Mystic”, as always my main concern is checking to make sure there’s no significant battery damage on the game. What’s interesting is when I looked at the game, there was no battery on the MPU board. The owners insisted the game saved the high scores, but I didn’t see how? Was there a battery on the underside of the board? I had to pull the MPU out to see.

What I saw was a board that someone had repaired, that had leaking batteries on it. They simply pulled the board and replaced a few damaged components and did not put a battery back in. But they created another issue by not fully-cleaning the board, and as a result, the damage from the leaking battery, even though it was long gone, continued…

Did you really clean that board well enough?

The other day I was reminded of how important it is to make sure you fully mitigate battery acid leakage on circuit boards.  A friend picked up a STTNG (Star Trek the Next Generation) pinball machine.  I’ve been systematically going over the game trying to get it working.  When I first looked at the backbox I noticed wires had been run for a remote battery pack – I thought “good deal, one less thing I have to worry about.. the MPU board is clean…” so I went about working on other areas of the game, checking switches and optos and everything.  After I got the game booting up I discovered the start button would not work.  After spending a bunch of time testing all the wires and connectors and still not finding the culprit I took a closer look at the MPU board where the cabinet switches plug in…

I have seen acid damage before, but nothing as sneaky and widely-spread as this. Components all across the main processing board were showing signs of corrosion and damage, but I could also see that repairs had been done, several components and ICs had been replaced and sockets added. Someone cleaned up battery damage and added an external battery pack. But there was still major corrosion on the board… what gives??

My theory is that whoever cleaned the circuit board, instead of using vinegar and multiple paper towels or q-tips, they probably used a single wipe, and in the process of cleaning the circuit board, actually spread the acid all over the components! At the time, they thought it was clean, but they actually made the problem worse.

This is why it’s very important to thoroughly clean off any leaked electrolyte from batteries, and use vinegar to neutralize it, and use multiple wipes — do not wipe from one area to another area. Work on small parts of the board at a time, throw the q-tip or paper towel away and use a clean one when you start to work on another area of the board. Do not risk spreading the acid to previously un-damaged components.