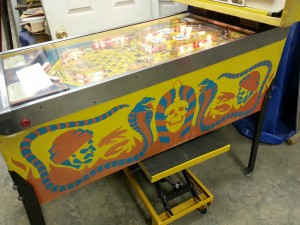
Lately, I’ve been developing a big appreciation for the 80s-era Bally games. As a kid I remember them kicking my ass and having unique and interesting rulesets that set them far apart from the Gottliebs and Sterns of the day, so when the chance to pick up a “Mystic” came up, I jumped at it, and drove about three hours to get this game.
Little did I know how special the game would end up being…
In the process of working on a 70s-era, early solid-state pinball machine from Stern (MPU-100 series), I had a need to rebuild one of the connectors, so I thought I might make a video. In this case I’m re-building the smaller .100″ connector. At some point in the future I’d prefer to make a better video of this process on a bench, but unfortunately, most of the time when you’re working on these connectors, you’re huddled over the machine messing with the wiring harness.
As many of you know, one of the biggest problems with pinball machines and repairing them is dealing with leaky batteries on solid state machines, that cause corrosion and all sorts of damage. I’m going to go over how you can completely eliminate this from happening by replacing old-style rechargeable batteries with a high-tech “memory capacitor” that will last longer and not have the same problems that batteries do.
Now lets test the new memory capacitor in the game:
As work continues on the Mr. and Mrs. Pac Man pinball game, I am finally ready to fire up a game and see how it plays so far…
There’s still work to do. There are some audio problems and I have to special-order these odd light fixtures that work in the center of the game, the “Pac Lite Matrix” as they call it. As long as some of those lights are out, it’s very difficult to play that part of the game. Stay tuned!
In this latest episode I deal with a sound problem on our Mr & Mrs Pac Man pinball machine. The sound and speech is intermittent and low in volume.
When dealing with any game that is 30 or more years old, you can bet that the capacitors are suspect. These electronic components are known to go bad over time, since they have liquid inside that can dry up, or leak out. It’s relatively easy to acquire and replace the components provided you have the right tools, and then you insure your game board will ideally last another 30 years.
In the video one thing to note is you aren’t always limited to having to find the exact same value/model capacitor. You can replace a capacitor with a lower voltage rating with one of a higher voltage rating. (i.e. replace a 25v cap with a 50v) But you want to make sure the capacitance value (in farads or microfarads) remains the same. You can also replace an axial cap (one with the leads coming out of each end) with a radial cap (with both leads coming out from just one end) as long as you get the polarity properly oriented. Make sure you note that markings usually point to the negative lead, while an indentation on one side of a capacitor will mark the positive lead.
After replacing the caps, we still have some flakyness with the speech portion of the board. I’ve got some replacement pots on order – when they come in I will check on the board traces and solder joints and probably replace that pot… stay tuned and thanks for following the saga!
As work continues on the restoration of the Bally Mr. & Mrs. Pac Man machine, I have run into a problem. I got the machine working, but after playing a few games I noticed the ball getting stuck next to the lower left flipper. The problem is, this game used a piece of plastic as part of the rail guide that had one end chipped off, forming a crevice the ball would constantly get stuck on. This is not a printed plastic and this game doesn’t have a whole lot of available spare parts for purchase at various places, so my main option is to fabricate my own lane guide…
After a quick trip to the hardware store to pick up the parts, I show off one of the cool tools in my workshop…
After cutting out the plexi piece, let’s see how it looks…
In the continued saga of bringing this 1980s game back to life, I begin to go over the electronics and figure out why the game wouldn’t boot up. Normally you fire up these Bally machines and count the number of times the LED on the MPU board blinks, but in this case, the game didn’t even get far enough to begin to start up the MPU. Fuse F3 kept blowing and the game wouldn’t power up at all…
An examination of the schematics showed an area on the power rectifier board where it was likely some components were damaged and needed to be replace. Luckily, these were not very obscure items so I could pick them up easily.
Stay tuned for the next installment where I go into addressing an issue with a broken plastic rail guide that probably can’t easily be replaced, so I have to fabricate my own!