Rebuilding pinball flipper assembly (Gottlieb System 3)

Here are two videos of me completely rebuilding the flippers and flipper assembly on a Gottlieb System 3 pinball machine (Waterworld) – many of this information will basically pertain to most flipper systems on other machines like Bally and WMS, Stern, etc. I go through the whole process of replacing all the major wear parts on the flipper assembly even including the base plate and end-of-stroke switches.

Here’s part 2 (sorry I rarely edit these videos so sometimes my camera breaks it into separate files)

Part 3

If the above is too slow, check out this time-lapse of rebuilding the flipper:

Rebuilding a Gottlieb VUK (vertical up kicker)

As work continues restoring this Gottlieb system 3 pinball machine, “Waterworld”, I rebuild the broken VUK (vertical up-kicker). This is from a series of videos where I rebuild a number of the core components on this game that’s been on location for probably more than a decade.

Diagnosing and testing optos on a Gottlieb System 3: Waterworld

Another video from my restoration work on this Gottlieb Waterworld pinball machine – actually two videos in this series where I talk about trying to isolate a problem with the optos on the game and comment about the design of the game and how the optos work, how to test and figure out what’s wrong?

But there’s more… I discovered an issue on this particular game, and possibly on other Gottlieb games that use this style of opto bracket… more info here:

Creating your own drop target artwork

Here’s a short video outlining my process of creating some custom artwork for drop targets for a Gottlieb System 3 pinball machine: Waterworld. I thought I might create some custom images to commemorate the huge budget of the movie’s production 😉

One note – after you put the decals on, put some heavy mylar over the decals to keep them intact – just the decal and triple thick isn’t enough to keep the graphics from not being damaged by the heavy pinball.

Check out the video!

First Look: “Waterworld” pinball by Gottlieb – pulled from a Casino

Here is a first look at a new pinball machine to enter the PinballHelp.com studio. This came out of a casino on the Gulf Coast, then found its way into the back room of a laser tag place and sat for quite awhile before the owners needed room and made me a deal on it. I don’t believe the previous owner did any work on the game so we have the original, largely un-maintained condition it was received from after being operated at a casino.

Follow along with me and let’s see what we notice about this game? How “hacked” is it? How much of it will actually work? What’s it going to take to get this game fully operational?

Fixing slingshots and coils that don’t fire on Williams System 3+

In this video series, I go over a 1979 Williams Flash pinball machine that has a few issues. After rebuilding the sound card and getting the sound working, I move on to figuring out why several of the playfield features are not working. I go through step-by-step trying to figure out where the problem is and why certain coils are not firing, eventually tracing it all back to logic chips on the driver board. Watch me as I fumble my way into getting the game back to 100%, and as usual, pardon my occasional tangents and erroneous conclusions as I diagnose where the problems are in this un-edited video series.
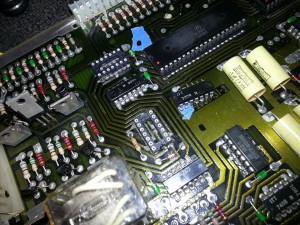
flash_ic
In Summary, there are a few steps to follow when you’re trying to diagnose a playfield coil that does not properly fire.

First, as always, make a visual check of the playfield and connectors to see if you notice any obvious problem like a broken wire or diode, coil winding that has come loose, or an obviously burned coil, or cracked/loose solder joint.

Second, check to see if there’s power to the coil and it can be manually trigger by grounding the non-power-supplied lug.

Third, go into coil test mode and see if the coil can be fired from the diagnostics. (if it can but not in game play, it is likely a switch problem)

Forth, trace continuity in the switch matrix wiring to/from the playfield. Also note (as I later discovered while working on this game) that if the coil is using one of the special solenoids, it will have a second trigger switch/line that needs to be checked.

Fifth, if continuity checks out, then test the switch matrix or trigger lines on the driver board.

If you’re at this point and things still don’t work, it’s time to examine the driver transistors and pre-drivers… you should have, at step 1, examined the driver board to see if there were any obviously burned components on the driver board. Now you have to bust out a multi-meter and check the transistors and ICs in the signal path — noting that if they test good, this dosn’t mean they necessarily are good.

If there still is no conclusive cause, you have to start replacing components, starting with driver and pre-driver transistors, and then the 7408 and 7402s.