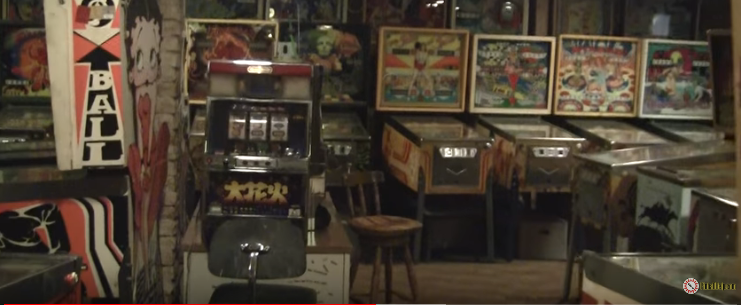
Inside the custom pinball machine, “This is Spinal Tap”

In the coming months, in addition to my regular chaotic addition of various repair, gameplay and maintenance videos, I’m going to be undertaking a new creative endeavor: making a custom pinball machine. As part of this process, I took a trip to the Texas Pinball Festival, paying close attention to what other people have done in this area. Here is a video of another enthusiast’s passion: a custom pinball machine themed after the movie, “This is Spinal Tap”. Here’s an impromptu video I shot while having a chat with the developers. I hope you enjoy it.

Upgrading Gottlieb System 80 MPU board with new battery pack

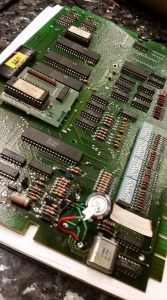
One of the first things you have to do when you get an original Gottlieb System 80 game is deal with their on-board NiCad battery pack, if it has not already been addressed. Gottlieb installed these batteries on the actual MPU board itself and like on other games, it’s a common cause of serious problems with the game. The batteries begin to leak after awhile, releasing electrolytes that corrode the MPU board and the components on it. This can happen even if you don’t see any obvious leaks. The batteries need to be replaced. There are a few options you have to do this: a remote battery pack (3 AA batteries along with a blocking diode to keep them from being charged if they’re not rechargeable batteries), a 2032 lithium coin cell, or my favorite, a 5.5v 1.5F memory capacitor. The memory cap will last the longest and will not destroy any components on the board. It will keep a charge for at least a month or more without power. Here’s a video of me adding this fix to a Gottlieb System 80B MPU


Upgrading eddy/proximity sensors on Bally/WMS games (Theater of Magic)

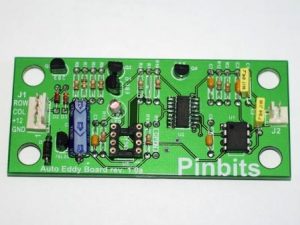
Recently I decided to replace the trunk eddy sensor on Theater of Magic with something more reliable than the original Bally/Williams proximity sensors. They are prone to “drifting” and will need regular adjustment. There’s a company that makes an auto-adjusting board that I wanted to try out, so here is my video showing the installation of that new board. This should make the game a little bit more reliable.

Dignosing and fixing a dead WPC MPU board (with RAM upgrade)

In this video series, I am working on a client’s “Dr. Who” pinball machine that wouldn’t boot up. It was just dead. None of the diagnostic LED blinks would blink on the WPC-89 MPU board, so I go over the process of how to identify and isolate the problem, then I upgrade the board with NVRAM (non-volatile memory) so that it will never need batteries again.

Stern Meteor Pinball – First Look at a new, heavily-played pick up

These days I’m pretty backed up on repair/restoration, but there’s always a “magic number” that’ll get me in gear to pick up a game. And when someone wants to reclaim their dining room or spare bedroom, I’ll do my best to help them out, as was the case with this “heavily-loved” Stern Meteor pinball game. I pop the hood on this baby and we take a look and see what’s going to be involved in getting it playable and in better condition..

Fixing slingshots and coils that don’t fire on Williams System 3+

In this video series, I go over a 1979 Williams Flash pinball machine that has a few issues. After rebuilding the sound card and getting the sound working, I move on to figuring out why several of the playfield features are not working. I go through step-by-step trying to figure out where the problem is and why certain coils are not firing, eventually tracing it all back to logic chips on the driver board. Watch me as I fumble my way into getting the game back to 100%, and as usual, pardon my occasional tangents and erroneous conclusions as I diagnose where the problems are in this un-edited video series.

flash_ic
In Summary, there are a few steps to follow when you’re trying to diagnose a playfield coil that does not properly fire.

First, as always, make a visual check of the playfield and connectors to see if you notice any obvious problem like a broken wire or diode, coil winding that has come loose, or an obviously burned coil, or cracked/loose solder joint.

Second, check to see if there’s power to the coil and it can be manually trigger by grounding the non-power-supplied lug.

Third, go into coil test mode and see if the coil can be fired from the diagnostics. (if it can but not in game play, it is likely a switch problem)

Forth, trace continuity in the switch matrix wiring to/from the playfield. Also note (as I later discovered while working on this game) that if the coil is using one of the special solenoids, it will have a second trigger switch/line that needs to be checked.

Fifth, if continuity checks out, then test the switch matrix or trigger lines on the driver board.

If you’re at this point and things still don’t work, it’s time to examine the driver transistors and pre-drivers… you should have, at step 1, examined the driver board to see if there were any obviously burned components on the driver board. Now you have to bust out a multi-meter and check the transistors and ICs in the signal path — noting that if they test good, this dosn’t mean they necessarily are good.

If there still is no conclusive cause, you have to start replacing components, starting with driver and pre-driver transistors, and then the 7408 and 7402s.