Here is a series of three short videos covering the process of removing and refurbishing the drop target assembly on early Stern/Bally games. This is done on the Trident I’m working on restoring.
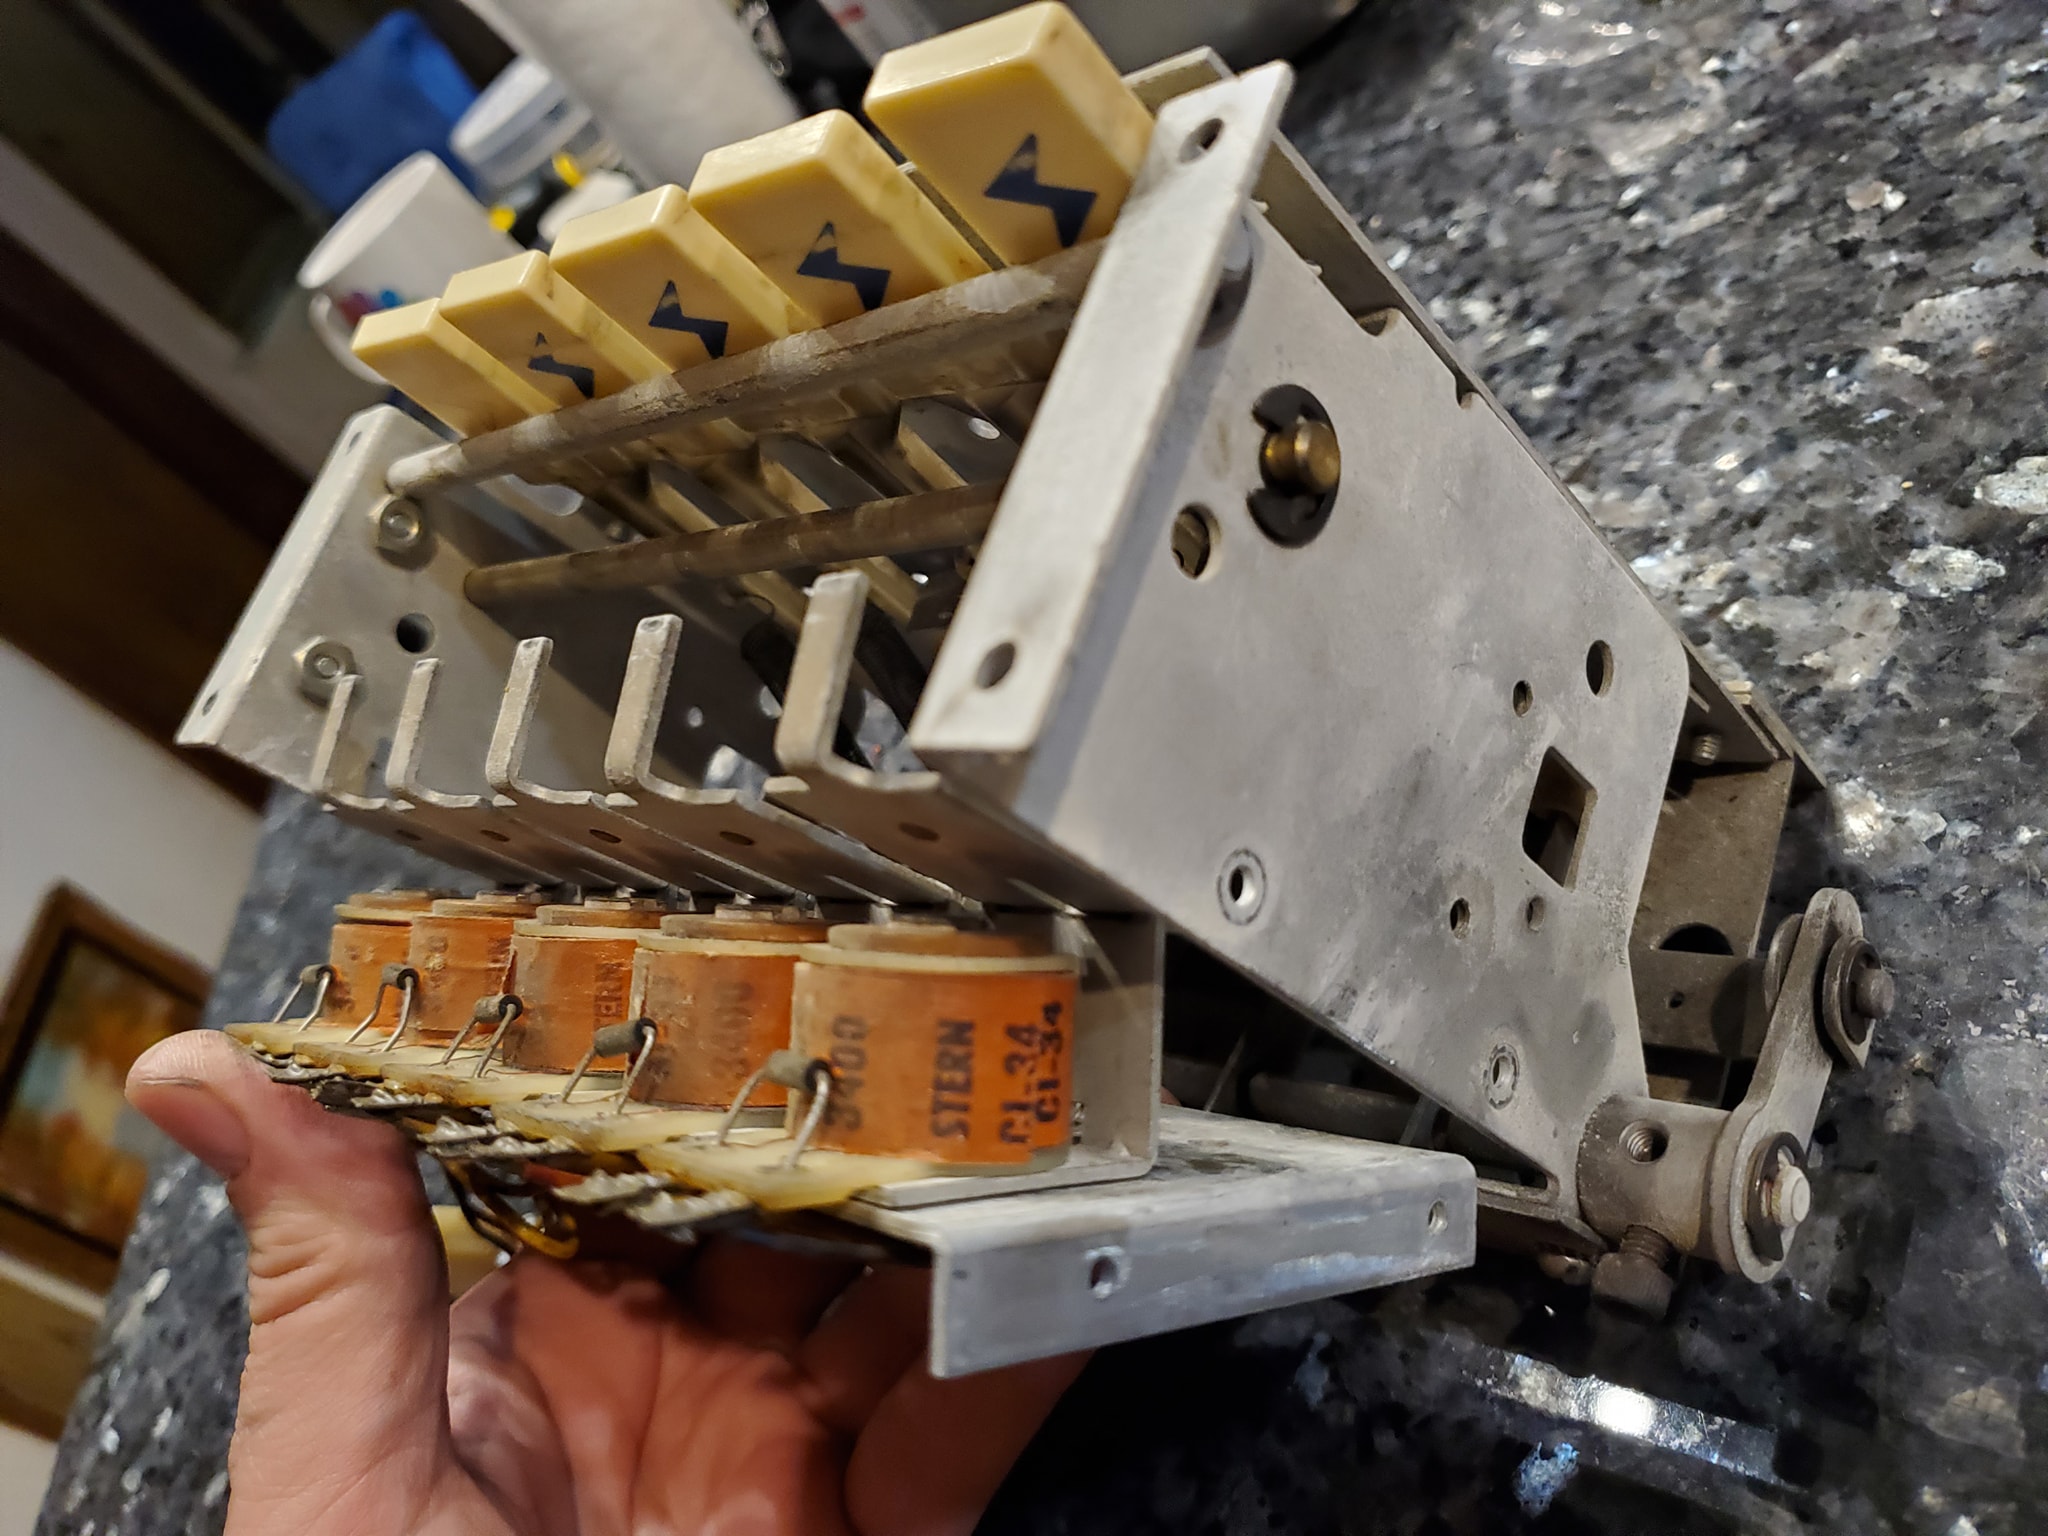
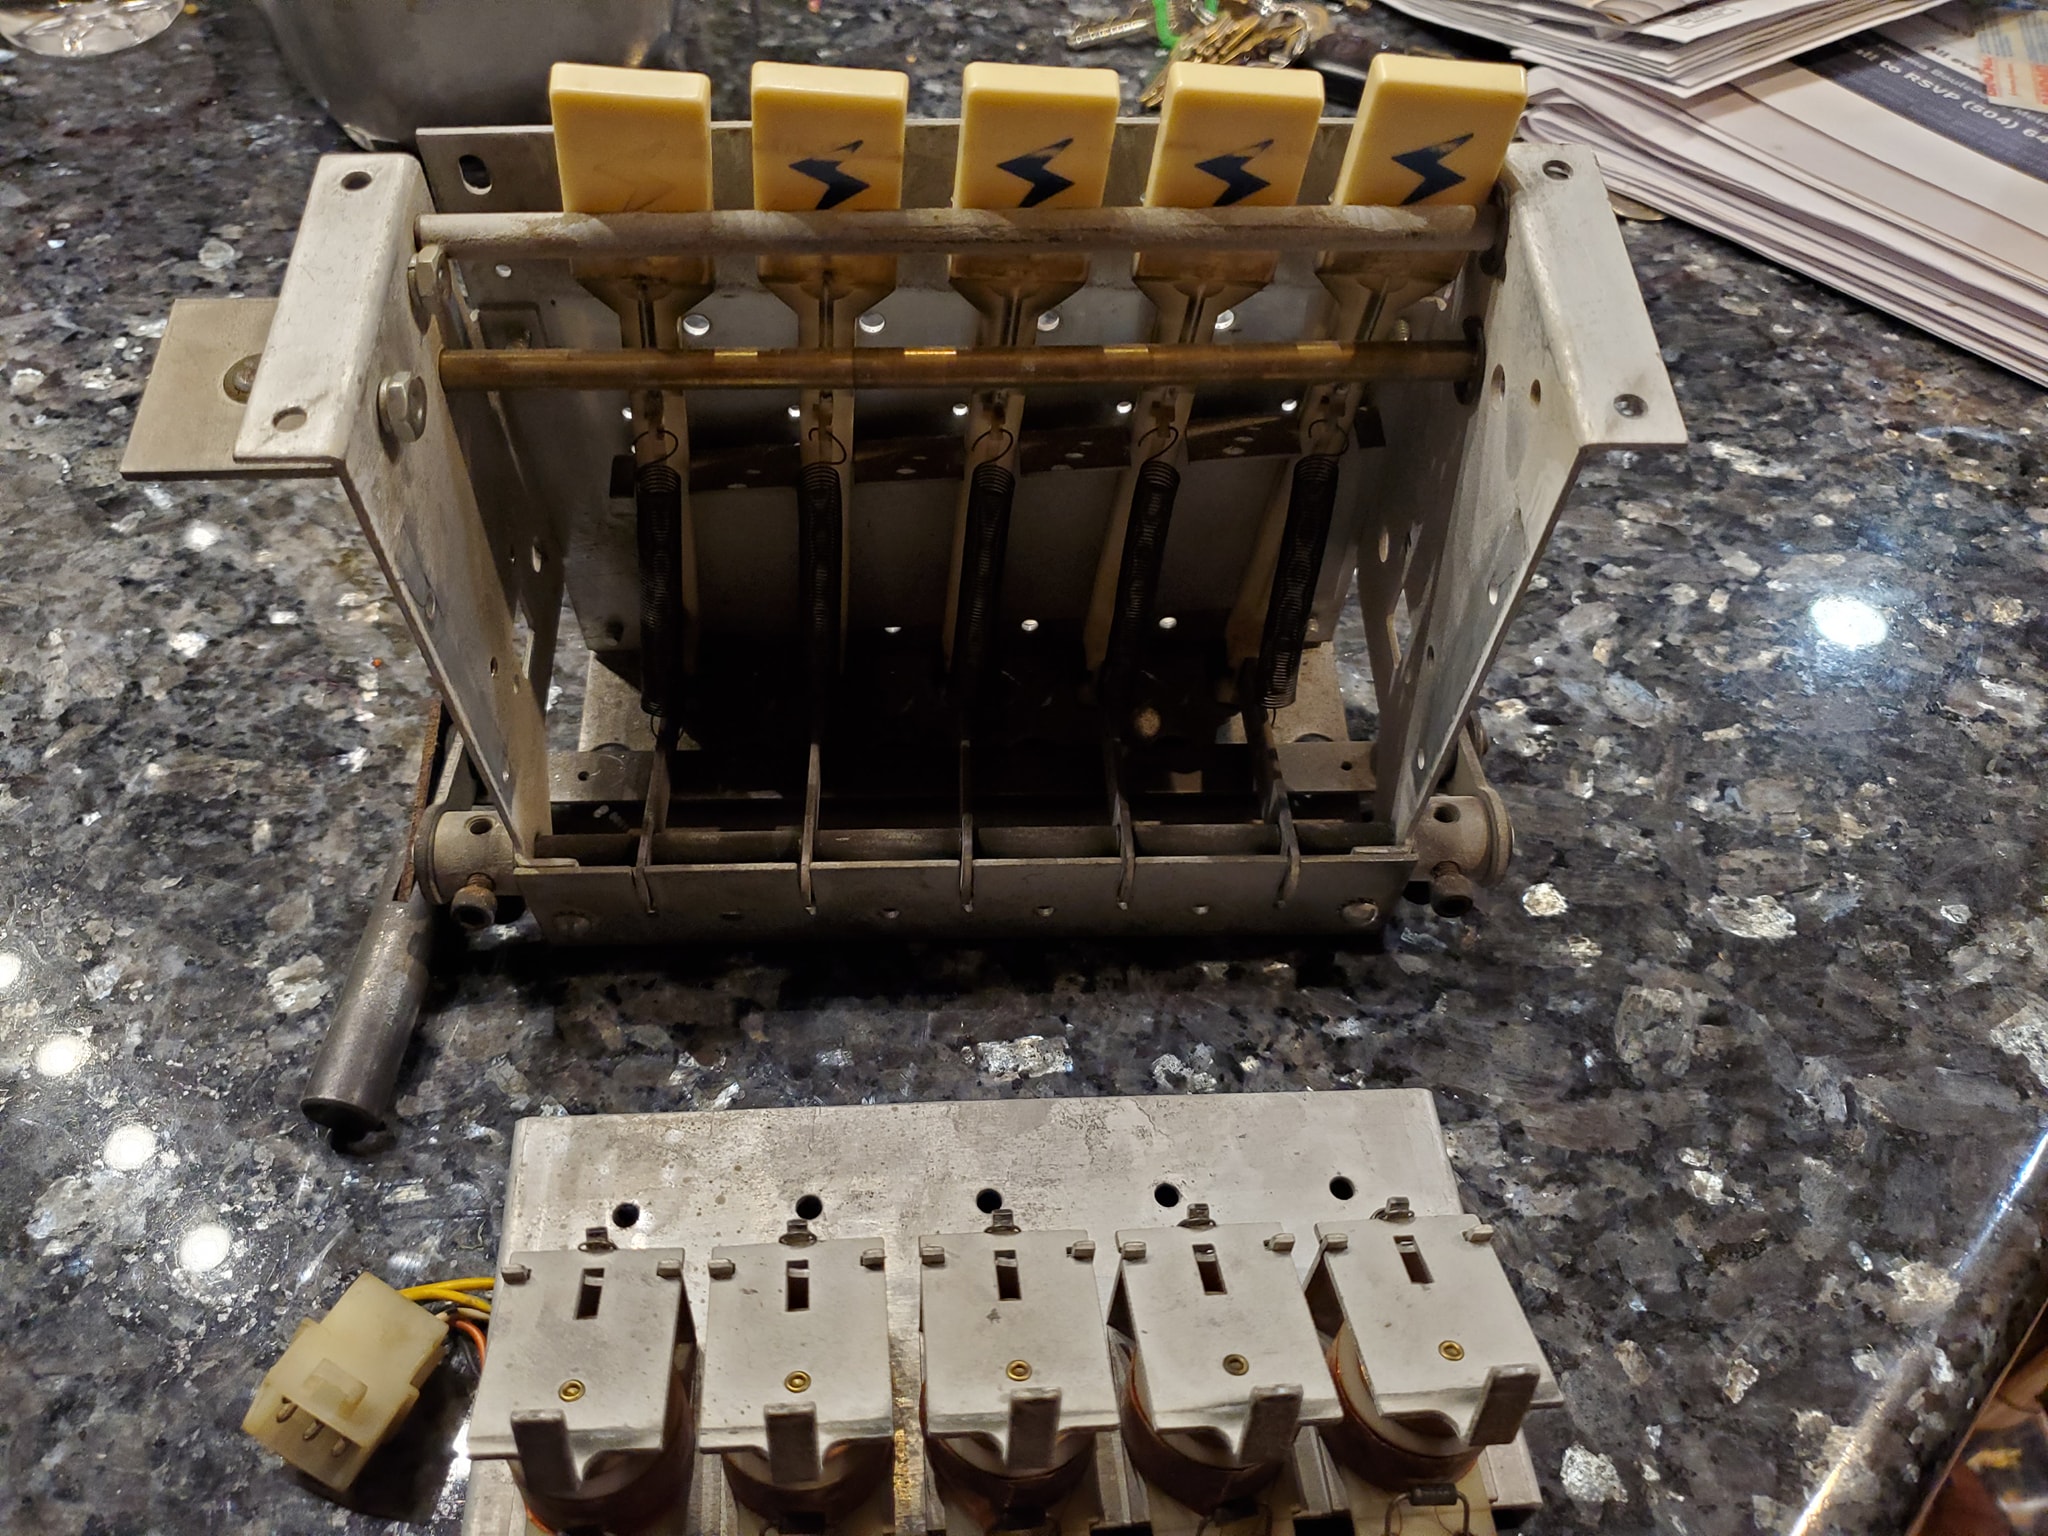
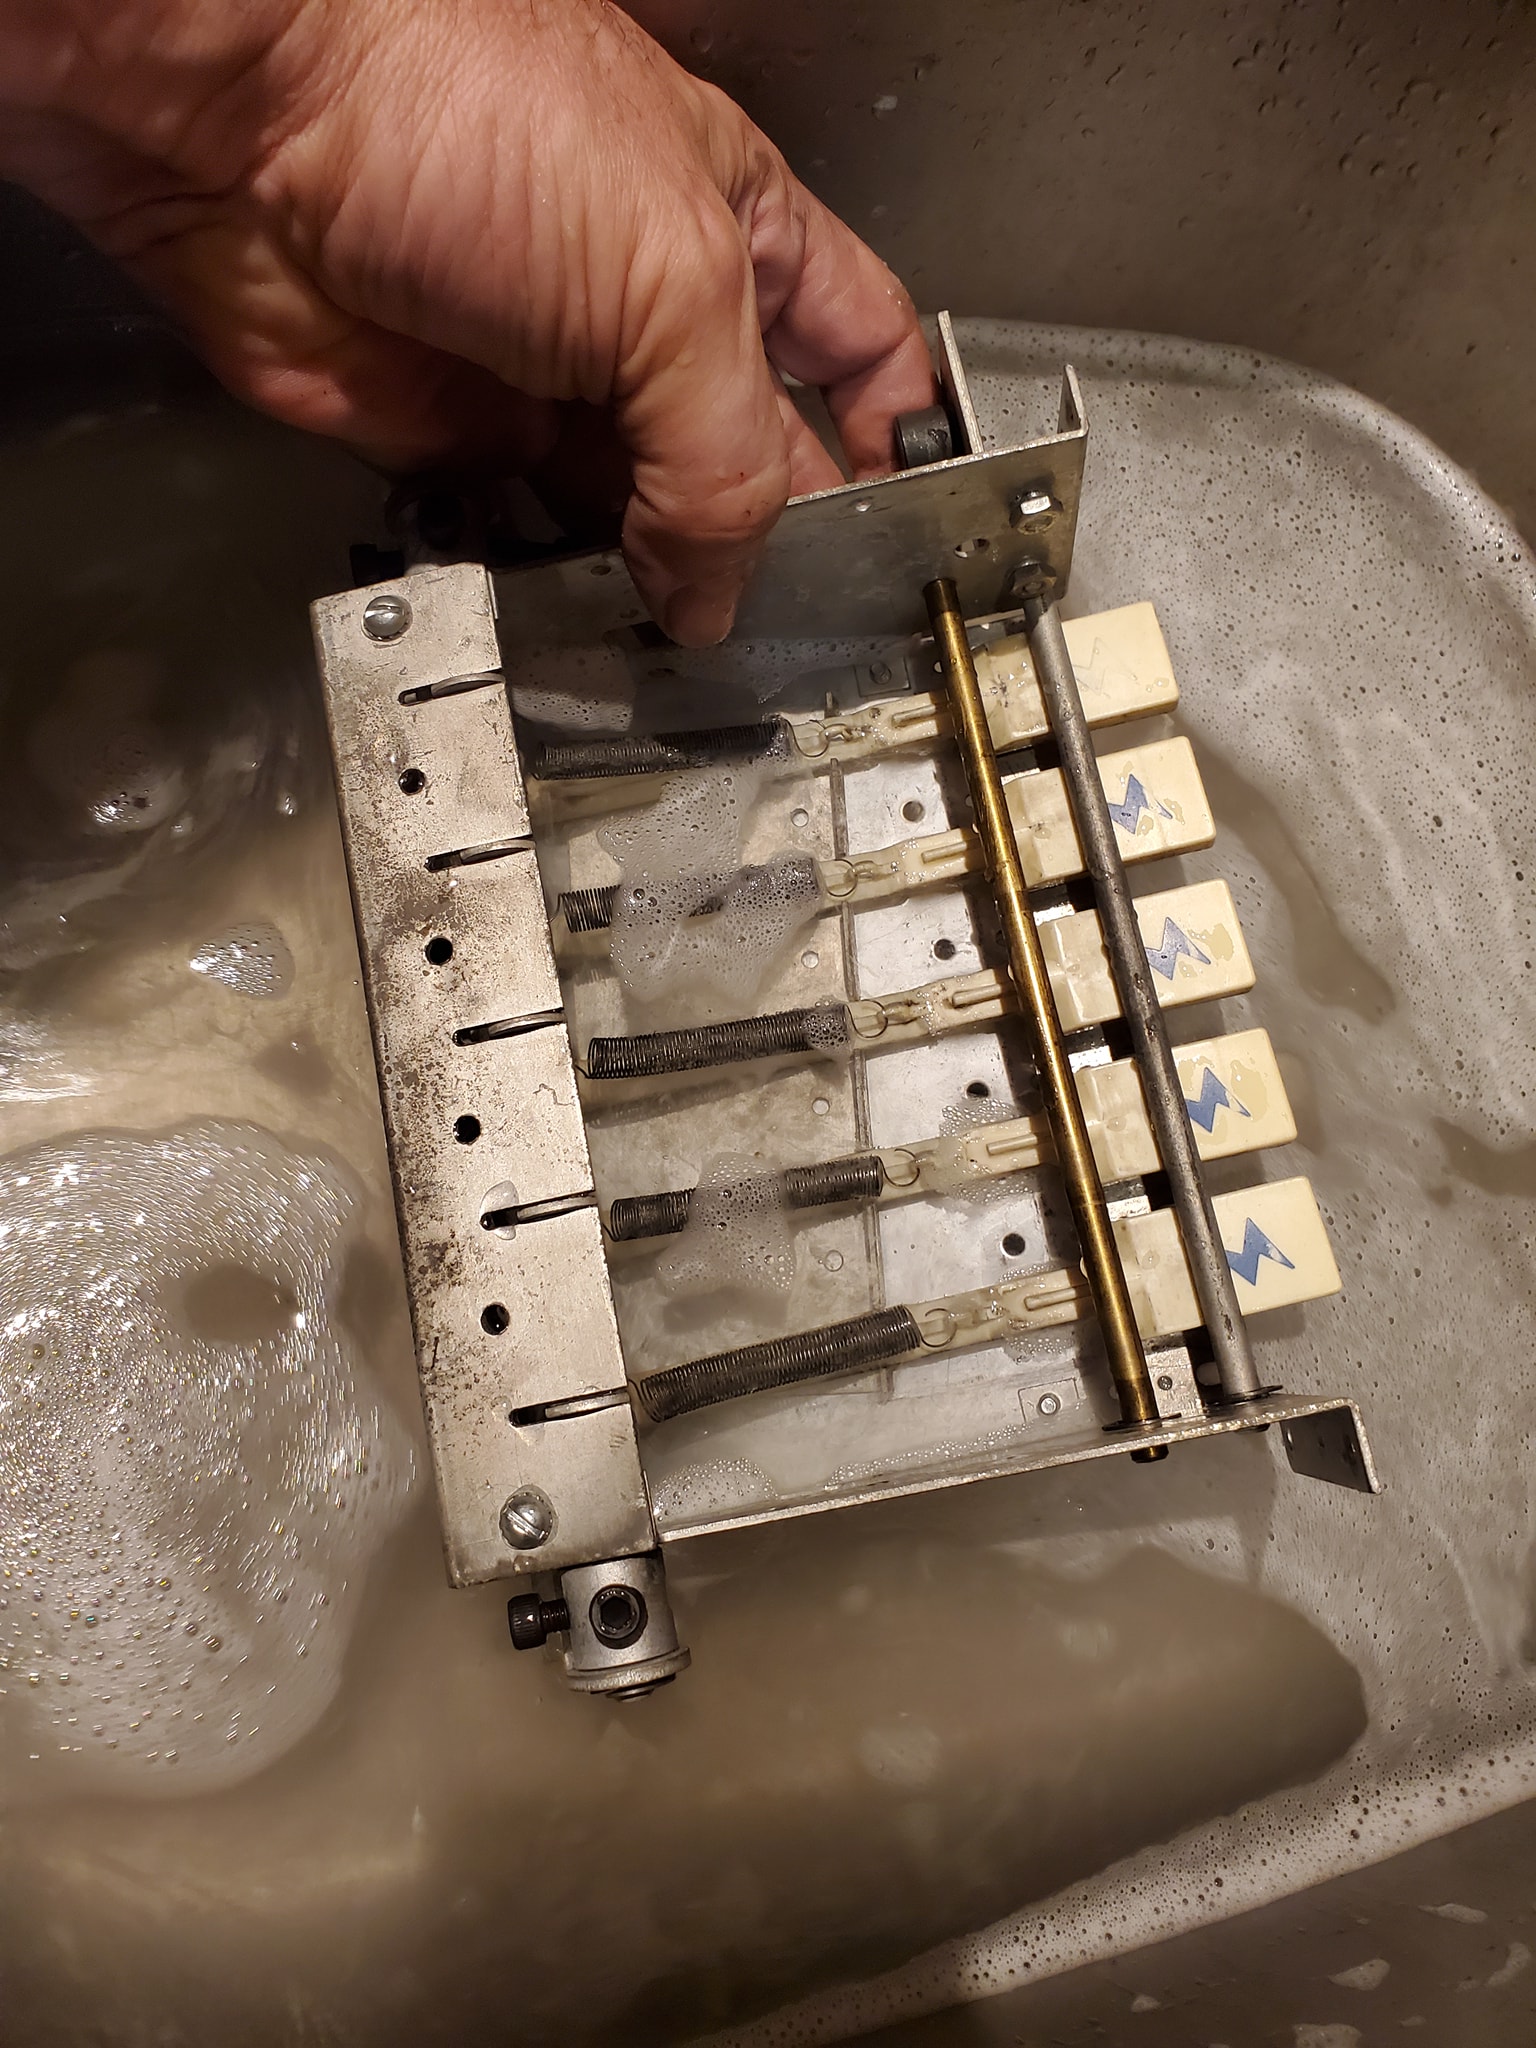

Here is a series of three short videos covering the process of removing and refurbishing the drop target assembly on early Stern/Bally games. This is done on the Trident I’m working on restoring.
Are you running into issues where the flipper in your pinball machine occasionally or regularly gets stuck? Here’s a quick trick to identify where the cause may be. The first step is to figure out if it’s an electrical or mechanical problem.
I’ve run into this problem at least 3-4 times in the last month with different early Bally/Stern solid state games: The game boots and appears to work but you can’t start a game and/or many switches/buttons don’t seem to work? Before you dive deep, try this simple, easy trick.
Be sure to subscribe: https://youtube.com/pinballhelp?sub_confirmation=1
I’ve been working on a new project that I’m very excited about. There’s been a movement to create an inexpensive, non-destructive and simple way to mod early Bally/Stern solid state games and add more features. In this video, I demonstrate an early prototype of the system used to modify a Bally Mata Hari pinball machine to include new features such as a skill shot, modes and even a wizard mode.
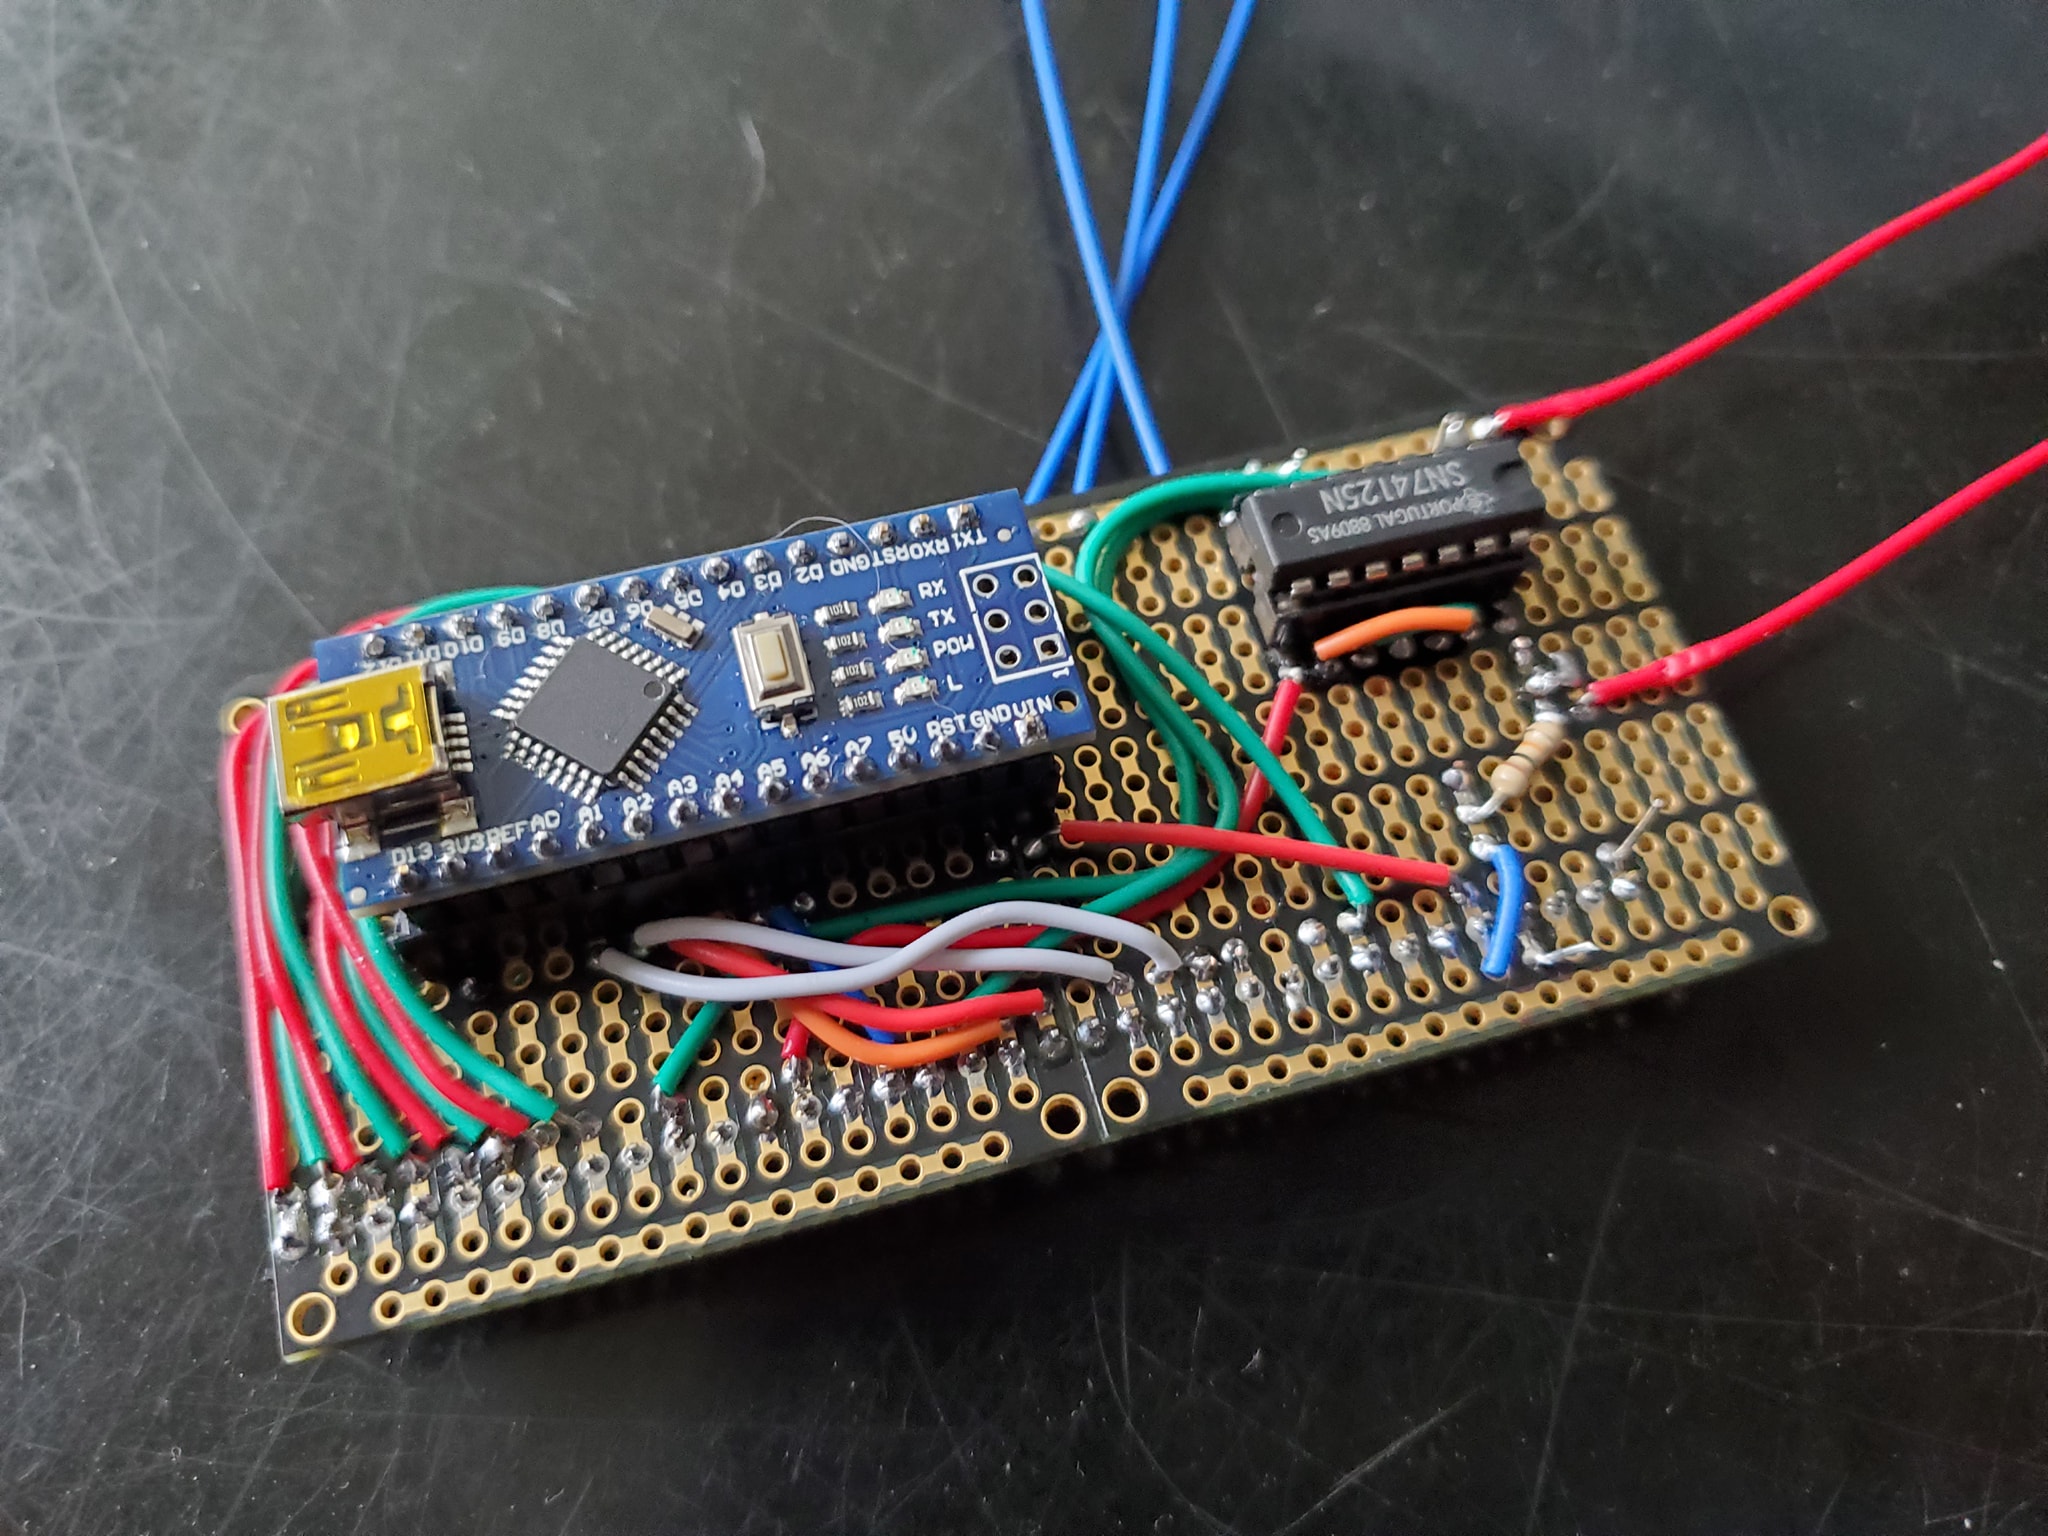
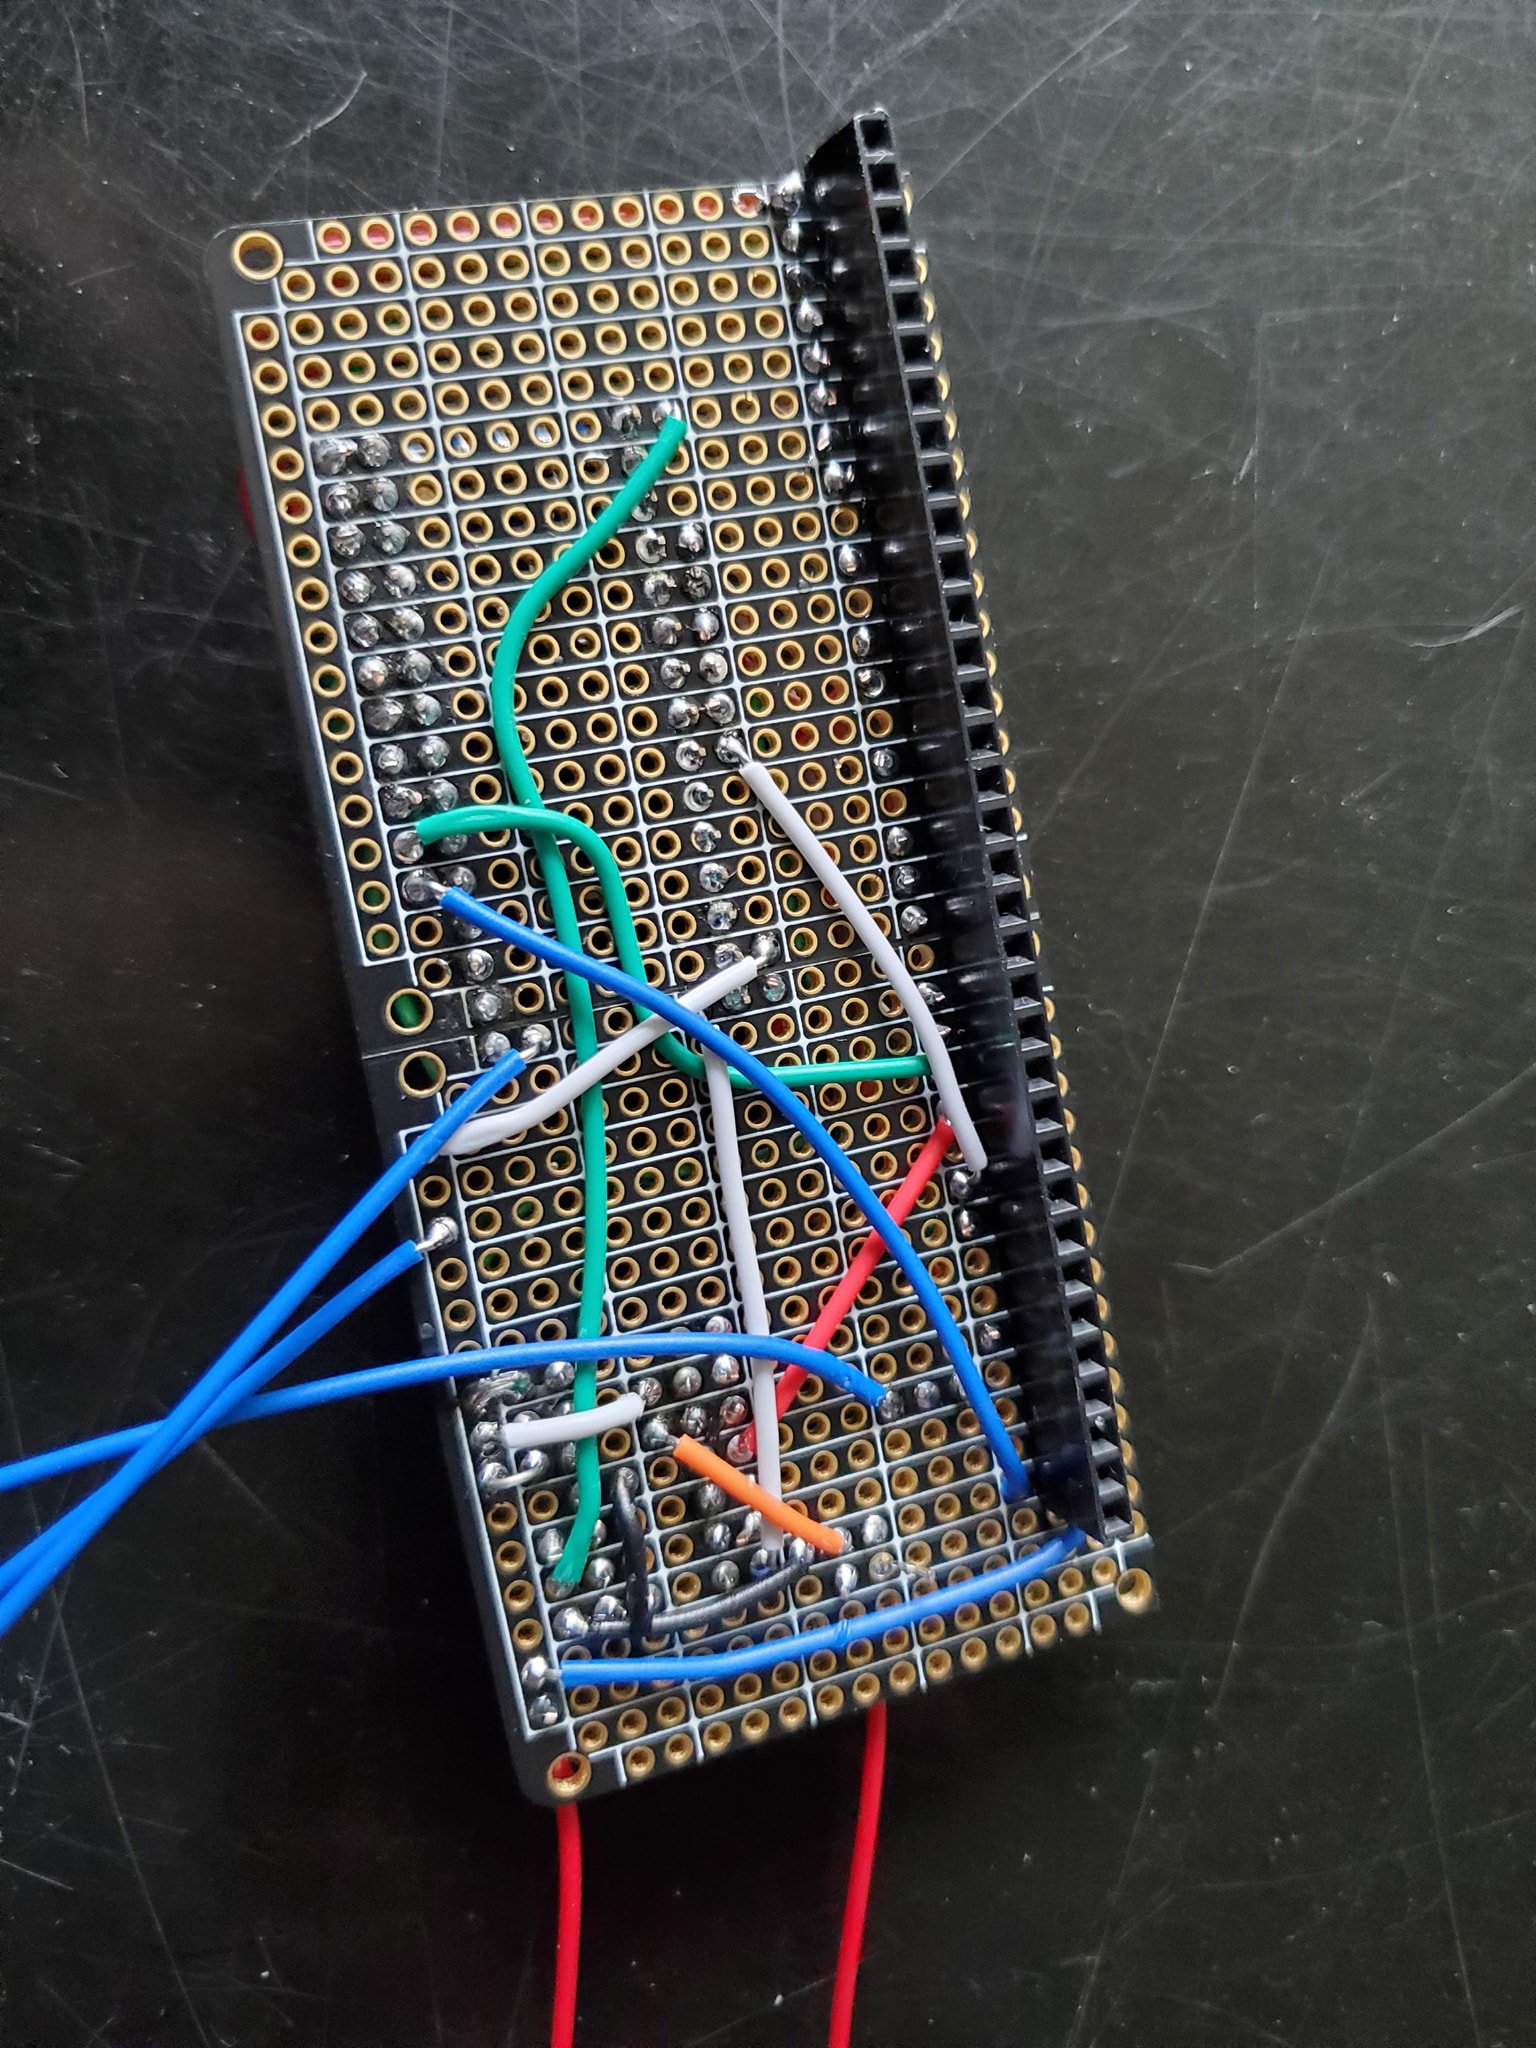
Want to learn more about this project? Visit: https://github.com/BallySternOS
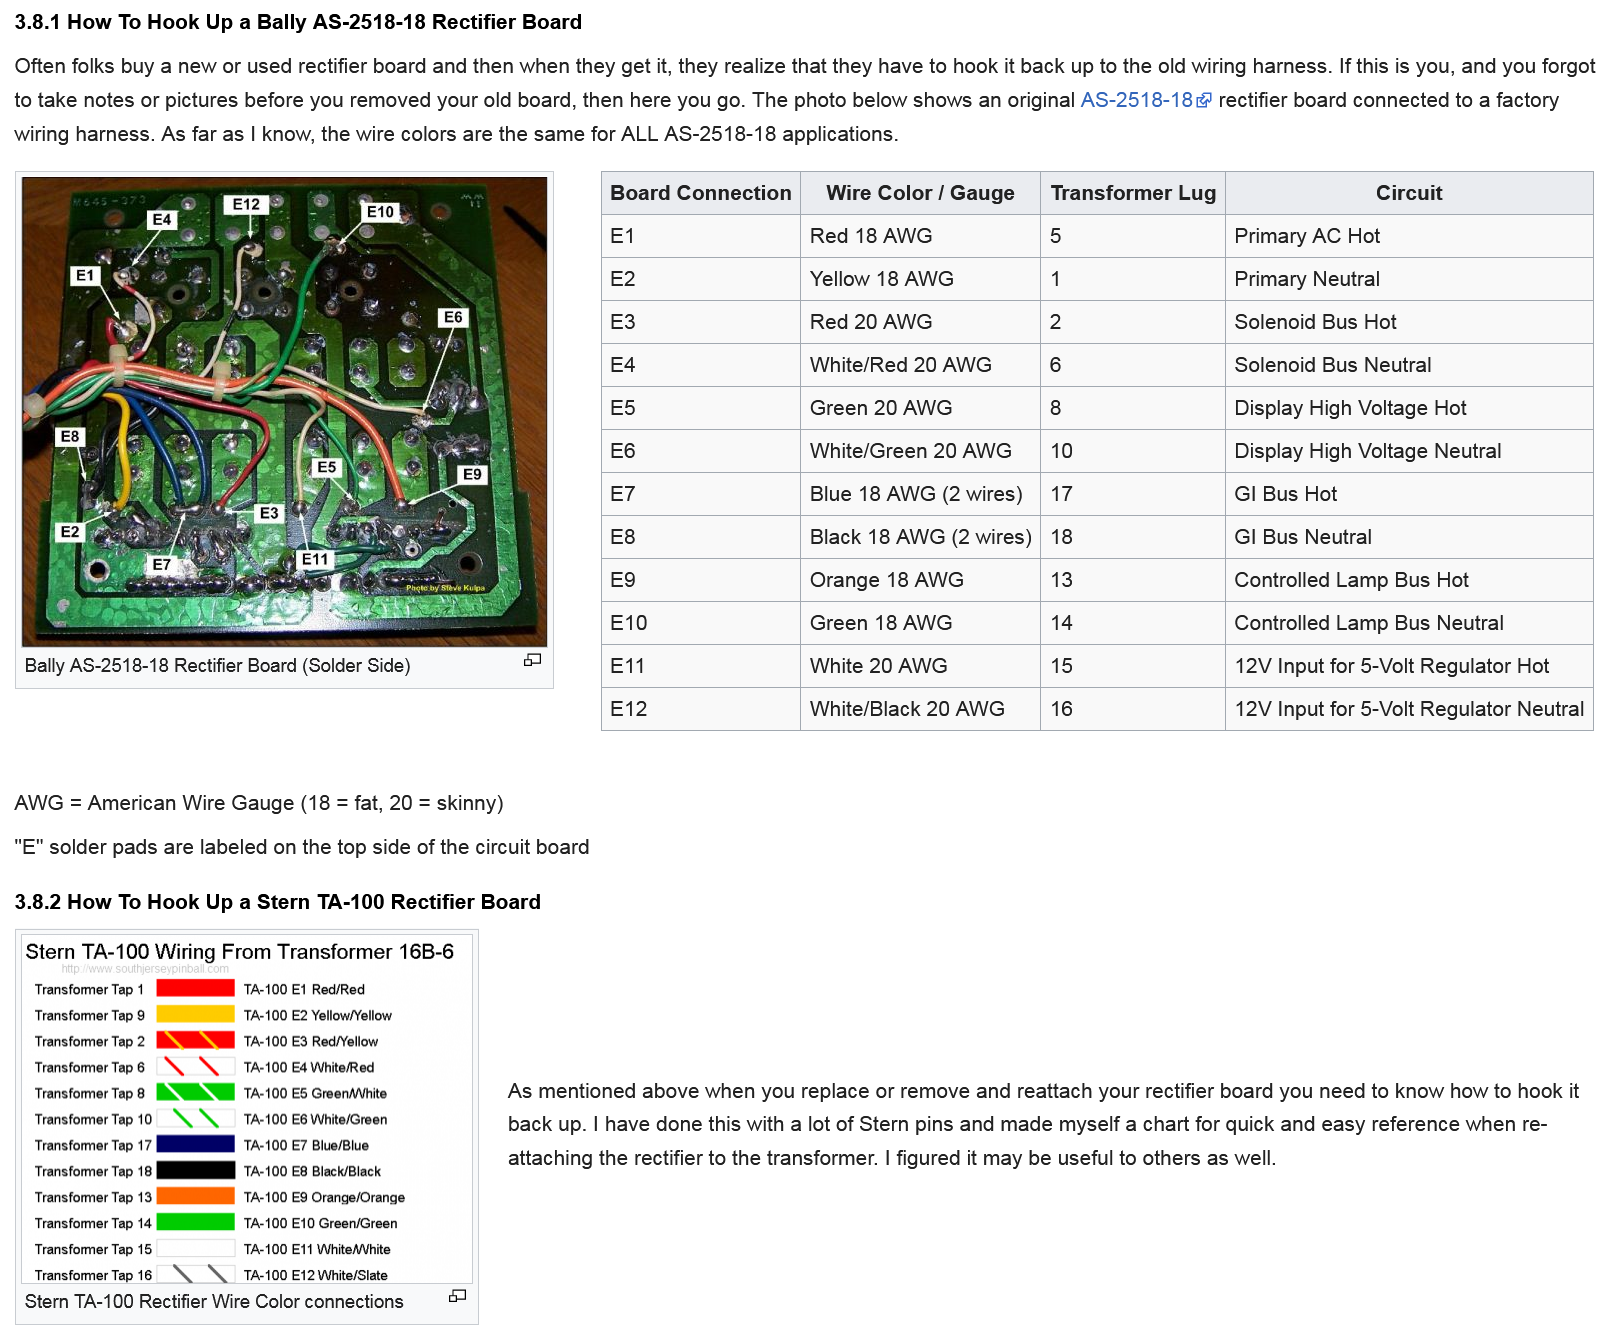
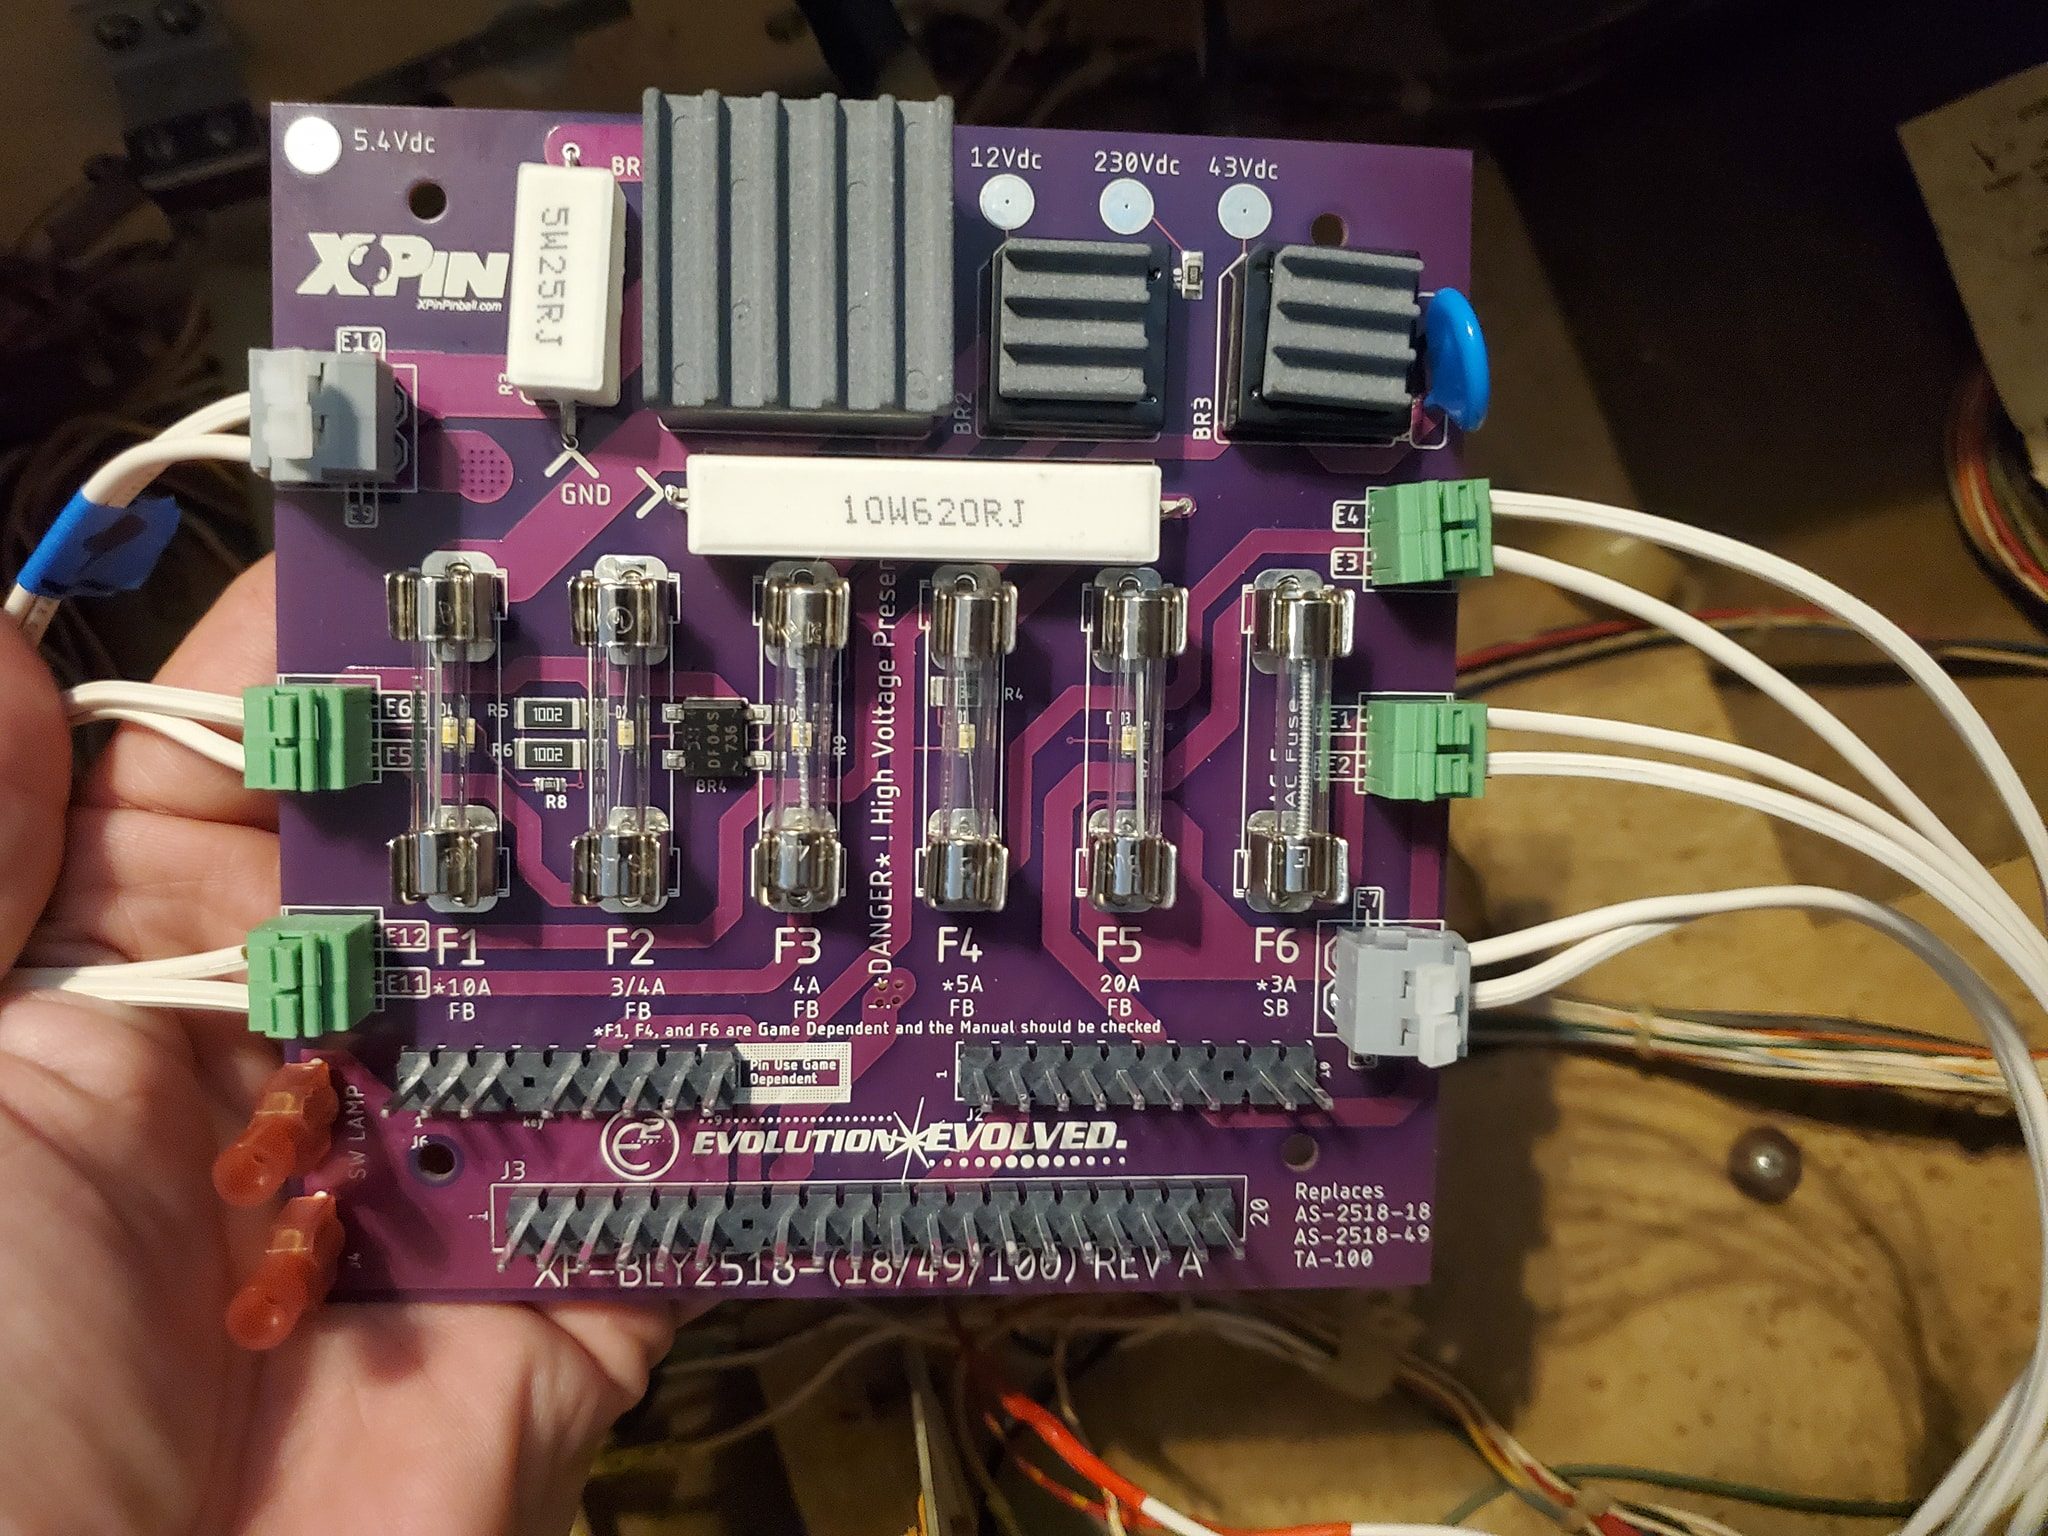
As part of the ongoing restoration of a 1979 Stern “Trident” pinball machine, here’s a series of videos outlining how to replace the rectifier board on these games. This varies a bit between Stern and Bally due to wire color codes. References are here.
This is a common problem that happens with old electro-mechanical pinball machines. One minute it’s playing fine, then the next there’s a loud buzz and/or the scoring runs continuously or doesn’t score properly. What’s the deal with that? I’m going to show you one of the most common causes.
Switch stacks are the primary parts of electro-mechanical pinball machines, triggering game activity. I go over in this video, how they work, the different types of switch configurations, and how to clean and maintain them so they work reliably.
Be sure to subscribe at: https://youtube.com/pinchurch?sub_confirmation=1